
So, a few months ago I was in a minor accident with my Ford Explorer. Nobody was hurt but insurance totaled out the Explorer. Well it was 15 years old and it doesn’t take much for insurance to say “not worth it.” So that left me without a daily driver. I had my Miata in the garage but it had been parked for a very long time. The tires were shot. The battery was D. E. A. D.
So, first step was to replace the battery and the tires. While I had a rental (courtesy of insurance) I took the wheels to the tire shop and got a new set of tires mounted. Ran to Batteries Plus and got a new battery. Got them home, installed them on the Miata and…great, it runs.
Apparently, however, a seal or something had deteriorated during its long period parked because a couple weeks later, while driving to work, the engine dies and I’m just coasting down the Interstate. I shift to neutral to avoid slowing down to fast (like right in the middle of the road) and pull over to the side. While I’m doing that I manage a glance at the instruments and…oh, engine temperature is pegged high.
This does not look good. Long story short, it wasn’t. Engine was toast. I had great insurance, including roadside assistance to get the car to a shop (Yay) and they check and no compression on three of the cylinders and just a hair on one of them. Yep. Engine is toast.
Too expensive to fix with the resources I had available at the time, at least not quickly, so I end up replacing the car (2009 Kia Spectra with 5 speed manual which I think is going to be another project, but that’s for another day). Later I have the Miata towed home (the shop recommended a tow company, Ward’s Towing, and they give me the “shop rate” so it’s only $80 to get the car back home even though it’s all the way across town).
Now, thanks to the time I spent with “Uncle Denny” (see the “My Life” posts, particularly part 8 and the forthcoming Part 10) I have considerable confidence that I can do the work to repair the engine. It just will take time.
And, so I’ve started. First step was to start tearing into the car to find out just how extensive the damage is. If it’s just a blown cylinder head gasket, that’s one thing. If it’s scored cylinder walls, that’s a whole other, and more extensive, matter. I’ll be working on this bit by bit over time and plan to chronicle the endeavor here.
I got the car up on jackstands. I figure I’ll have to be under it as well as working from the top so might as well get ready for that now. Then I opened up the hood and started the process of tearing into the engine. This first batch involves removing things that I can readily access and know need to come out so as to uncover other parts as I get to them. I also disconnected the battery. Remember that in a Miata, the battery is in the trunk.
This series will be a fairly complete record of what I do, mistakes and false trails and all. Also note that I don’t always have the correct name for things ready to hand as I am doing this so I’ll make up a description. If anything is unclear, let me know and I’ll try to clarify.
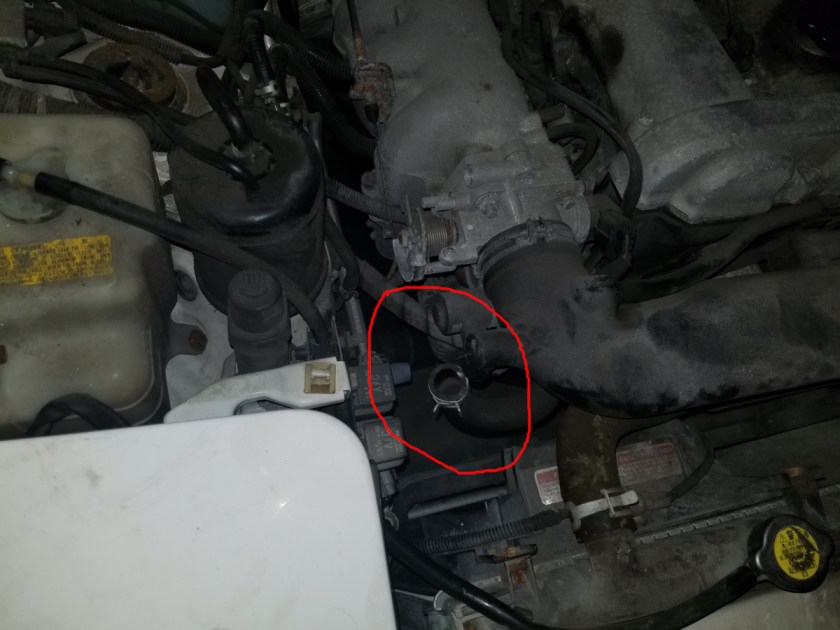
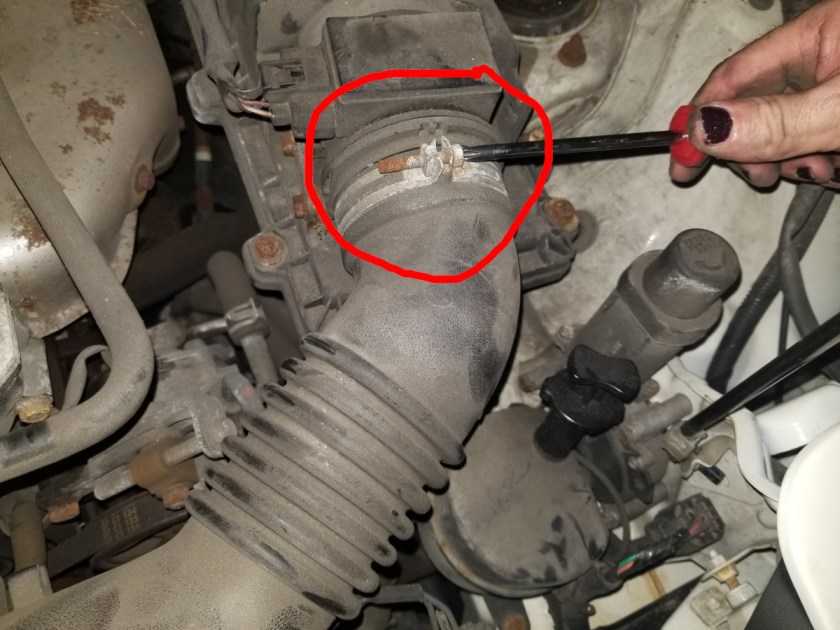
Here’s what I start with under the hood. The first thing I see to remove is the air tube that runs across the front of the engine from the air filter to the intake manifold.

There’s a hose that connects the air tube to something deeper in the engine compartment. It’s held in place by a clamp. There’s a special tool for removing these clamps but I didn’t have one. Vice grips worked well enough for this:

Once the clamp is loosened, prying from above and pulling and wiggling from below gets it removed.
This hose cuts across the front of the valve cover and is just force fit onto a barb connection.
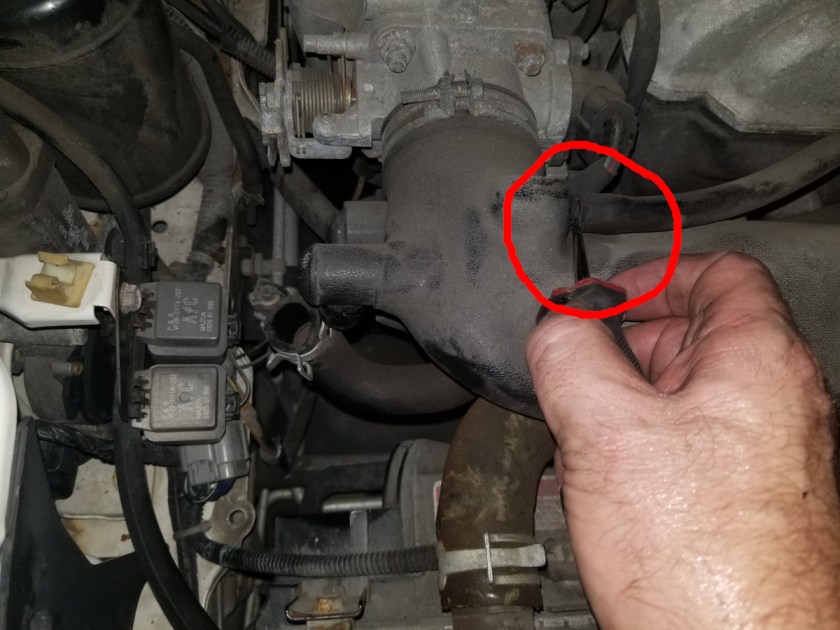
Once again, prying and pulling gets it removed.
With the extra hoses removed, we can now start working on the main air tube. This claim is kept tight by a screw, use a philips screwdriver to loosen it.

Once the clamp is loosened, you can pull the tube free at this end.
Same kind of clamp at the other end.
Once you free the other end and pull it loose, the whole thing just lifts out. Here it is set in front of the radiator.

Next piece that looks to be in the way is the upper radiator hose.

Same type of clamps as those previous hoses. A bit bigger so I had to use a larger pair of vice grips to loosen them.

And once again some prying, some pulling, managed to get it free.
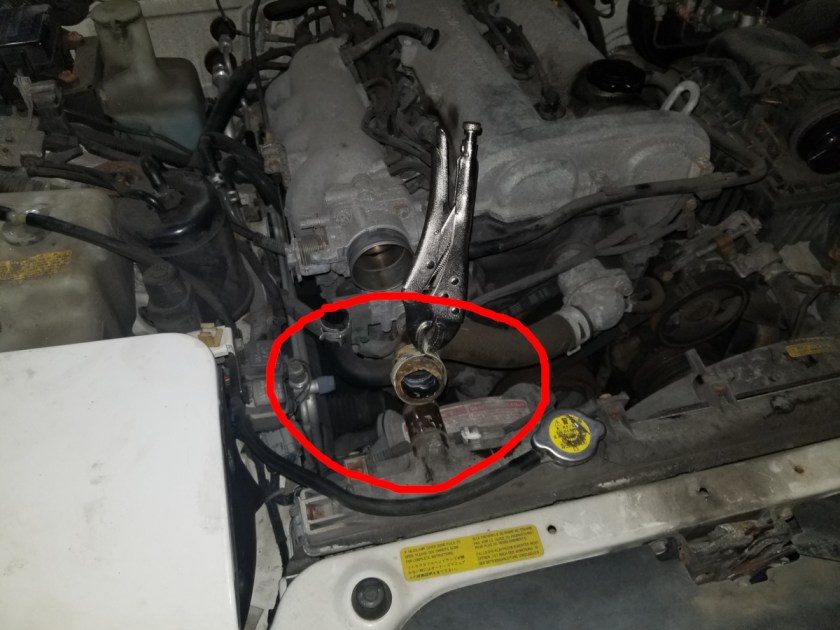
The other end is a bit more difficult because the grip points on the clamp were on the underside and thus, harder to reach. Still, I got the vice grip on there.
And it came free. This end was a bit more difficult. I won’t say that there was some swearing involved in getting it off, but there was some swearing involved in getting it off.
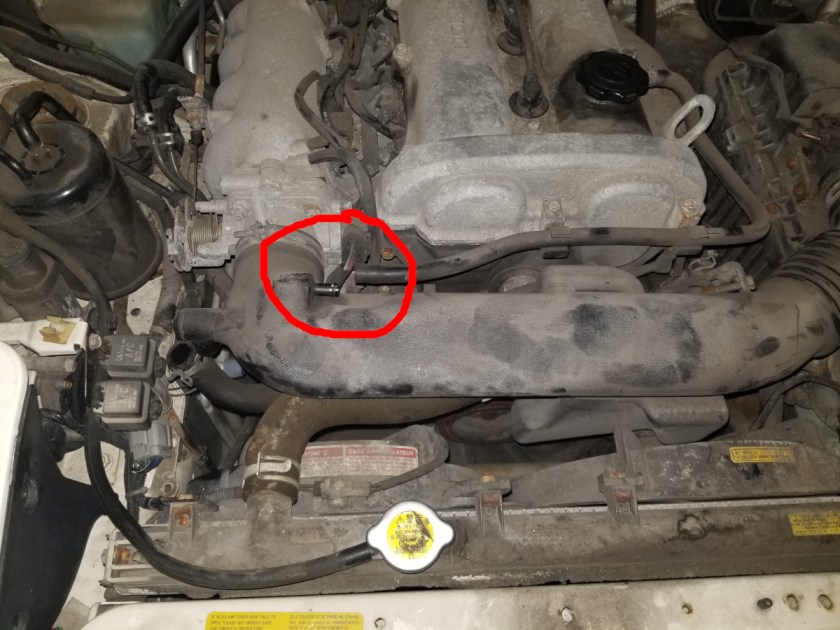
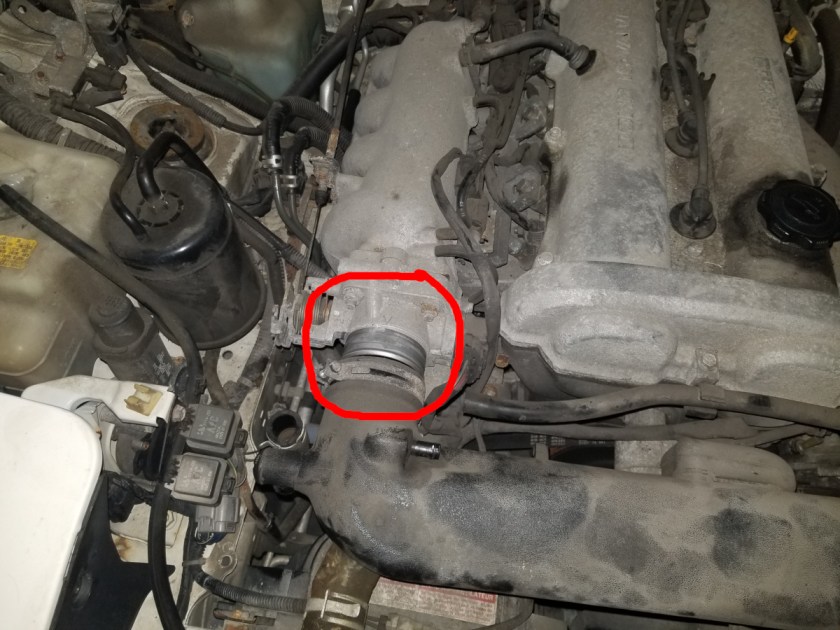
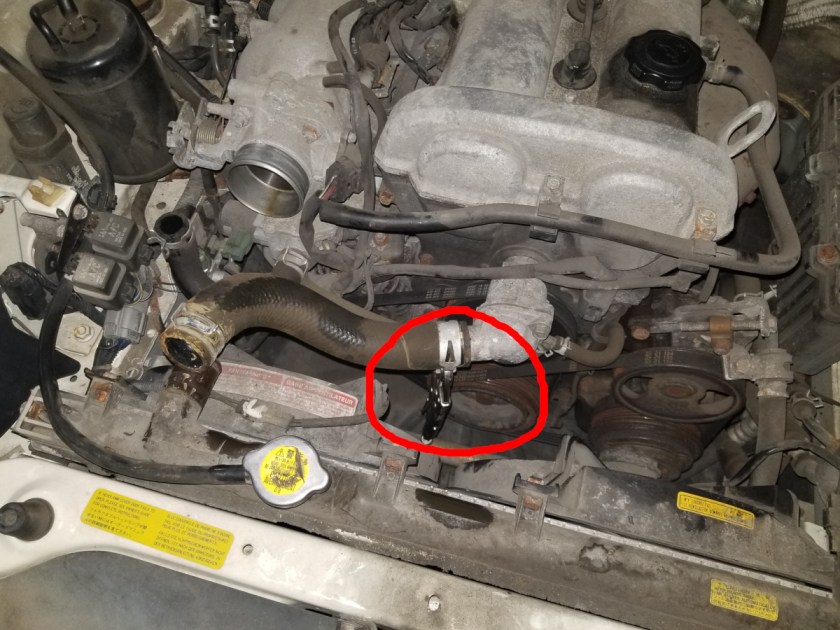
Next is the thermostat housing. It’s not really in the way at this point, but since I think it’s going to have to come off eventually for the work I need to do, now is as good a time as any to remove it. It’s held in place by a bolt on top and a nut underneath. Both require a 12 mm driver.

Housing comes off nicely, along with the thermostat itself. I screwed the bolt and nut loosely back into place just to keep from losing track of them. Notice that I’ve also stuck the upper radiator hose onto the radiator, twisted upward and out of the way. This, likewise, was to keep from losing track of it. Note those two hoses coming from the bottom of the thermostat receptical. I decided to disconnect them because, again, they were going to have to be disconnected eventually and now is as good a time as any.

Same kind of clamp arrangement as before.

They come loose without any trouble.

Next step is the valuve cover. I found eight bolts that need to be removed. There are two at the front that hold clips that secure a hose that we disconnected from the air tube up above. They look like they might need to be removed, but they do not. They are very short and don’t extend through the valve cover into the cylinder head. With the hose disconnected, you can ignore them.

Disconnect the PCV valve. I found that it comes loose with a gentle pull.
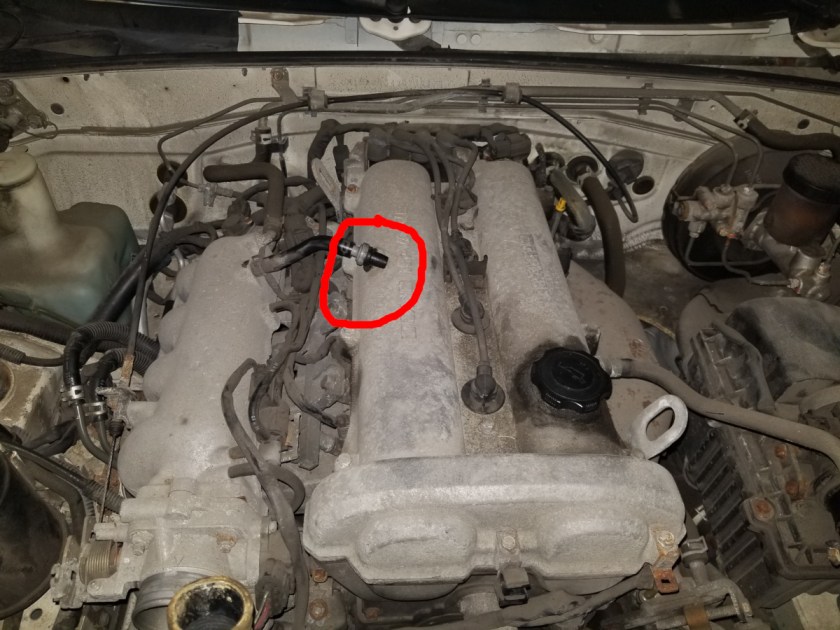
Next pull the spark plug wires and set them aside. Normally, at this point I’d remove the spark plugs too but I decided to leave them, both to save me the trouble of digging up the proper spark plug socket and to also keep the spark plug holes plugged to avoid anything falling into the cylinder while I’m working on this stuff.

Next, remove the bolts that hold down the valve cover. These require a 10 mm socket. Yes, the infamous always disappearing 10 mm socket. I had a problem when I first started in that I thought the head had been stripped. Turned out the problem was that the socket was cheap junk and had split so it couldn’t properly grip the bolt. Fortunately, I had another.
Decided to remove the spark plug wires entirely and set them aside, just get them completely out of the way.

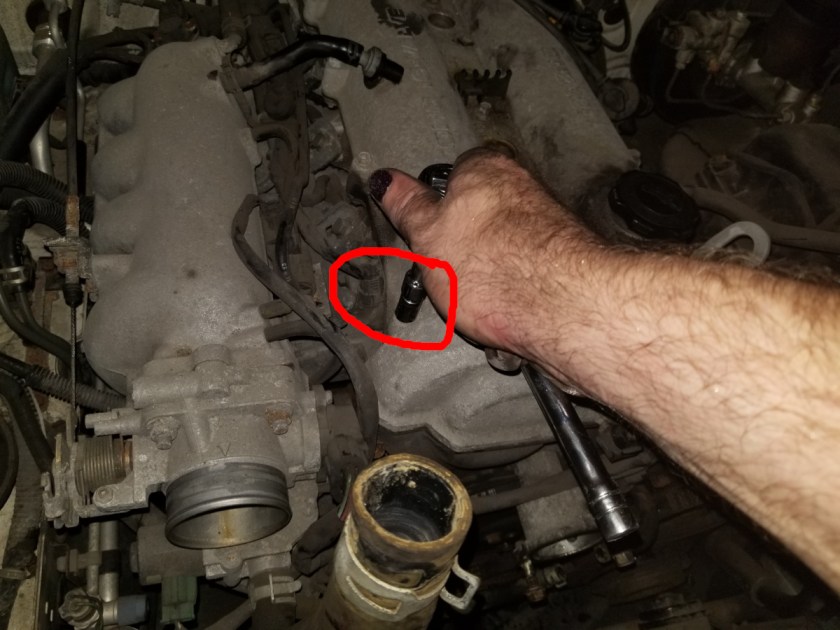
And the valve cover still would not come off. Something was hanging up at the back. I thought maybe it was the wiring tethering it into place so I disconnected these two plugs.

That wasn’t it. I stopped at that point to look online (or if I can find my fershlunger manual; it’s around here someplace) to see what I missed.
That’s where I pick up next time on Project Miata.

Never did a Miata. Just a TR-3A a Volksie and a couple of scoots. Love the ‘travelog’ so to speak. The documentation photos are outstanding.
LikeLike
Amazing.
Just looking at the pictures makes me smell ethylene glycol and feel oily grit on my hands.
LikeLike
1. Replace the radiator hose, otherwise it will split when you go for your first drive. It’s a law of car repairs.
2. Buy better tools. You should never own the kind of tools where sockets split.
3. Did you label the spark plug wires as to which plug they go to? If not, might want to go back and do that. It isn’t always obvious when reinstalling.
4. Sometimes gaskets “weld” themselves to the parts, requiring judicious use of a rubber mallet to remove them, however, it is a good idea to be sure of yourself before wacking away. My Toyota 22RE engine had a bolt on the front of the cylinder head that was in a compartment that was generally filled with oil so you couldn’t see it. Took all the head bolts off and wacked for a while before deciding that something was seriously wrong. More research and the 10mm bolt was removed, after which the head lifted right off.
LikeLike
When I drained the coolant (that will be in the next part) I had less than a gallon, probably closer to half. I was ready to put the plug back in when the drip pan I neared full. No necessity there. I also pulled the dipstick and the tip was barely wet. I’ll be really surprised if I don’t have major cylinder wall scoring. That means a major rebuild in which case I’ll probably replace all the hoses. And at that point, well, there’s a stroker kit for the 1.8 L engine that brings it up to 2.1 L, port the head and…in something as small and light as the Miata that can make a big difference in acceleration.
The problem is that stroker kit is on the close order of $5000 and no way to break it down into stages and pay for it incrementally. It’s an all-or-nothing deal.
The other issue is that I’ve got some rust-through in the driver’s side rocker panel. That’s a serious concern since that’s a significant part of structural strength. Replacement panels are available but that’s a matter of significant welding (a skill I will need to acquire). This is a large part of why I’m thinking donor for a kit/homebuilt project. But first I have to see how much of the drivetrain is saveable.
LikeLike