
The clutch on my 2009 Kia Spectra started slipping so I had to replace the clutch. I looked at having a shop do it but estimates available online were talking the high side of $1000. This made a lot more sense once I saw that the “shop” method involves removing the front sub frame which…yeah, no.
Now I’m decent shadetree mechanic and while I haven’t done this particular project before, I have done things of similar scope…or so I thought. So, I bought a clutch kit and dove in.
First time through there were issues and the upshot was that after it was done, the car wouldn’t start. That was trepidition enough but it also looks like the throwout bearing didn’t engage the pressure plate. Read on to find out about that. The result of all that is that I’m having to tear the whole thing down again. This time I’m getting step-by-step pictures. This is the result.
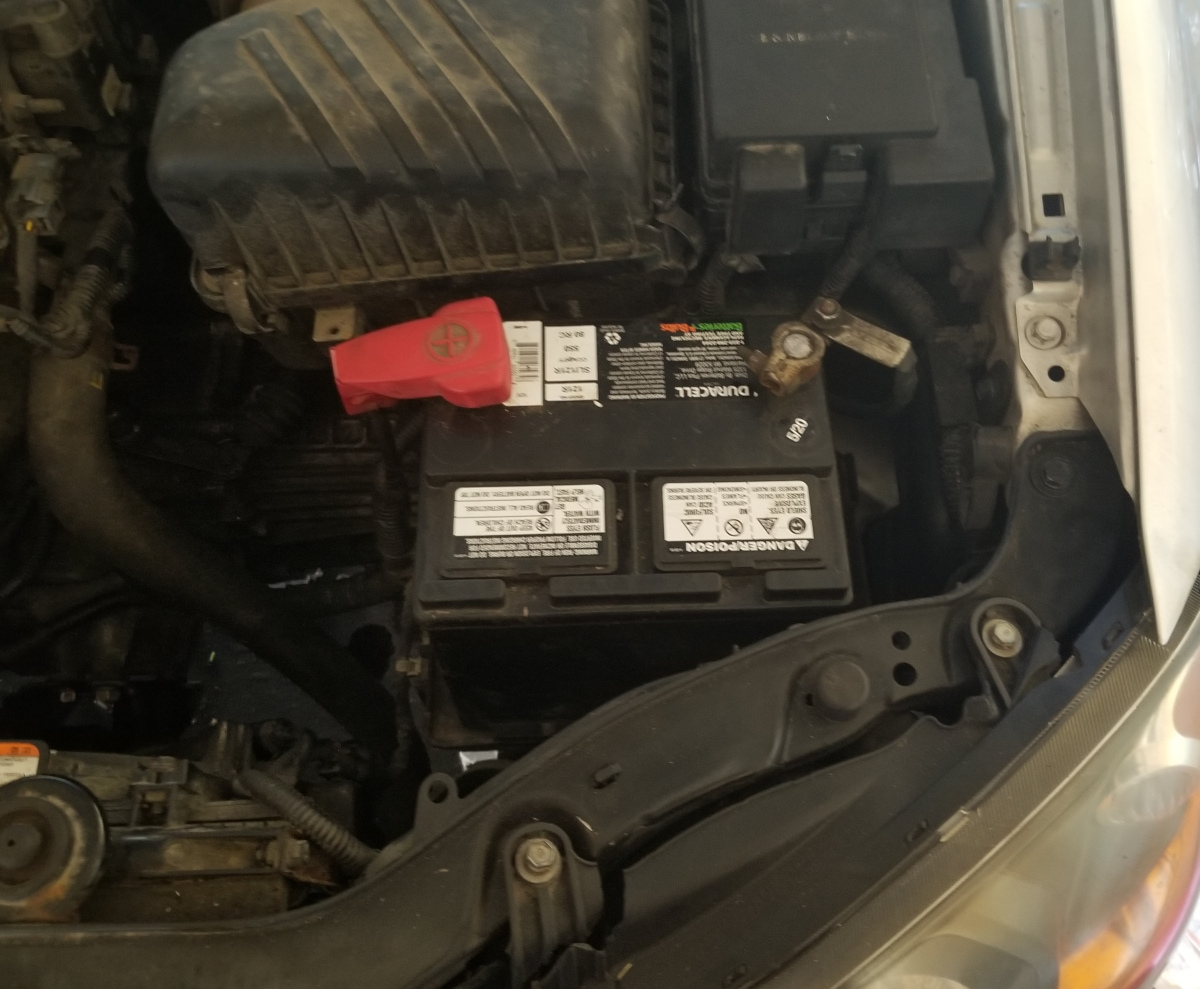
Most car engine projects start by disconnecting the battery. This one starts by removing the battery and battery holder plate.
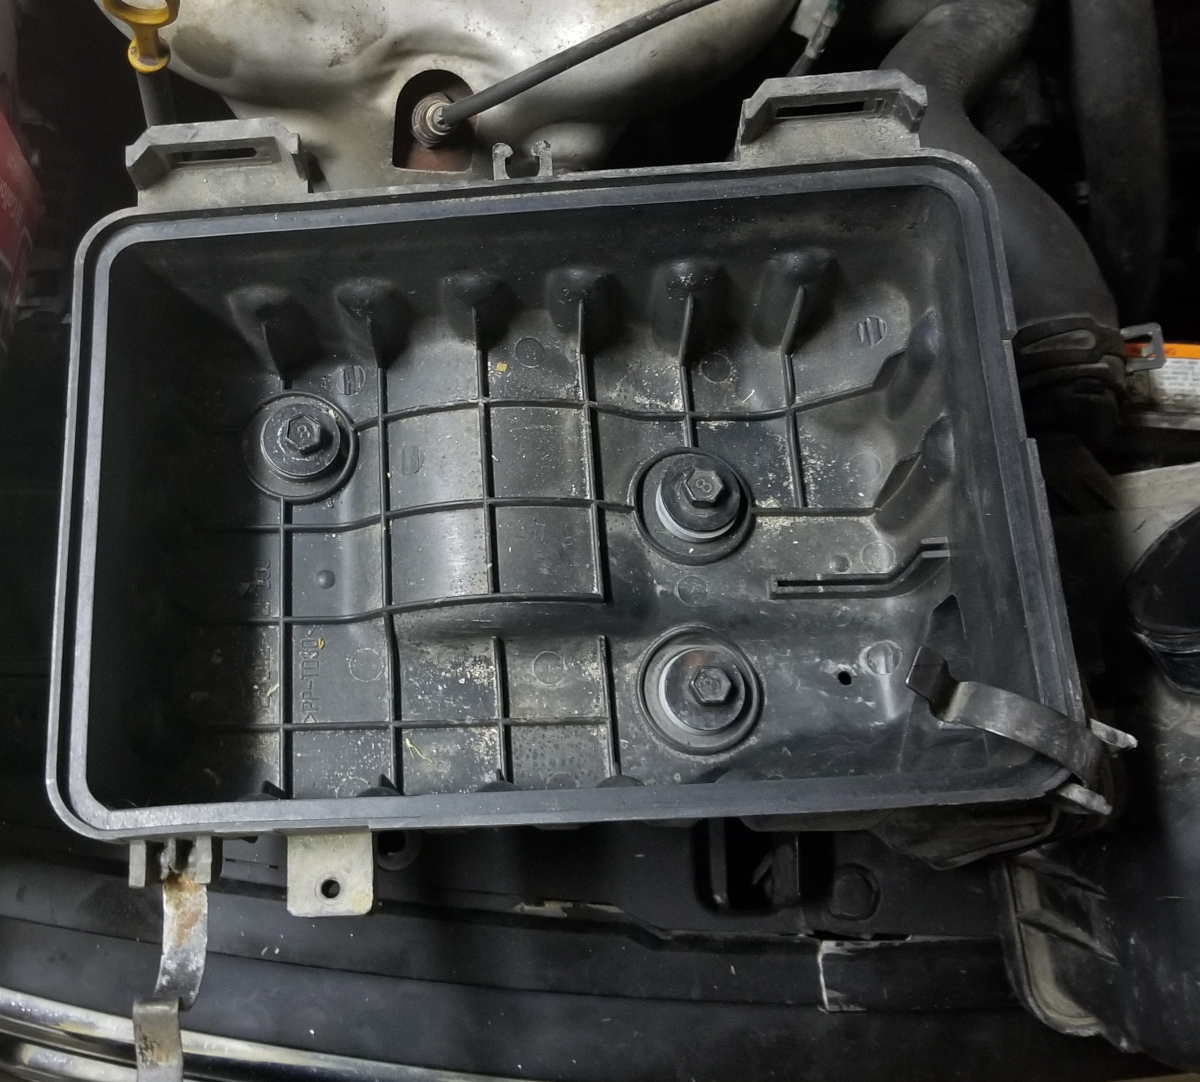
Here’s the battery in its original position. You can see the air filter box behind and to the left..
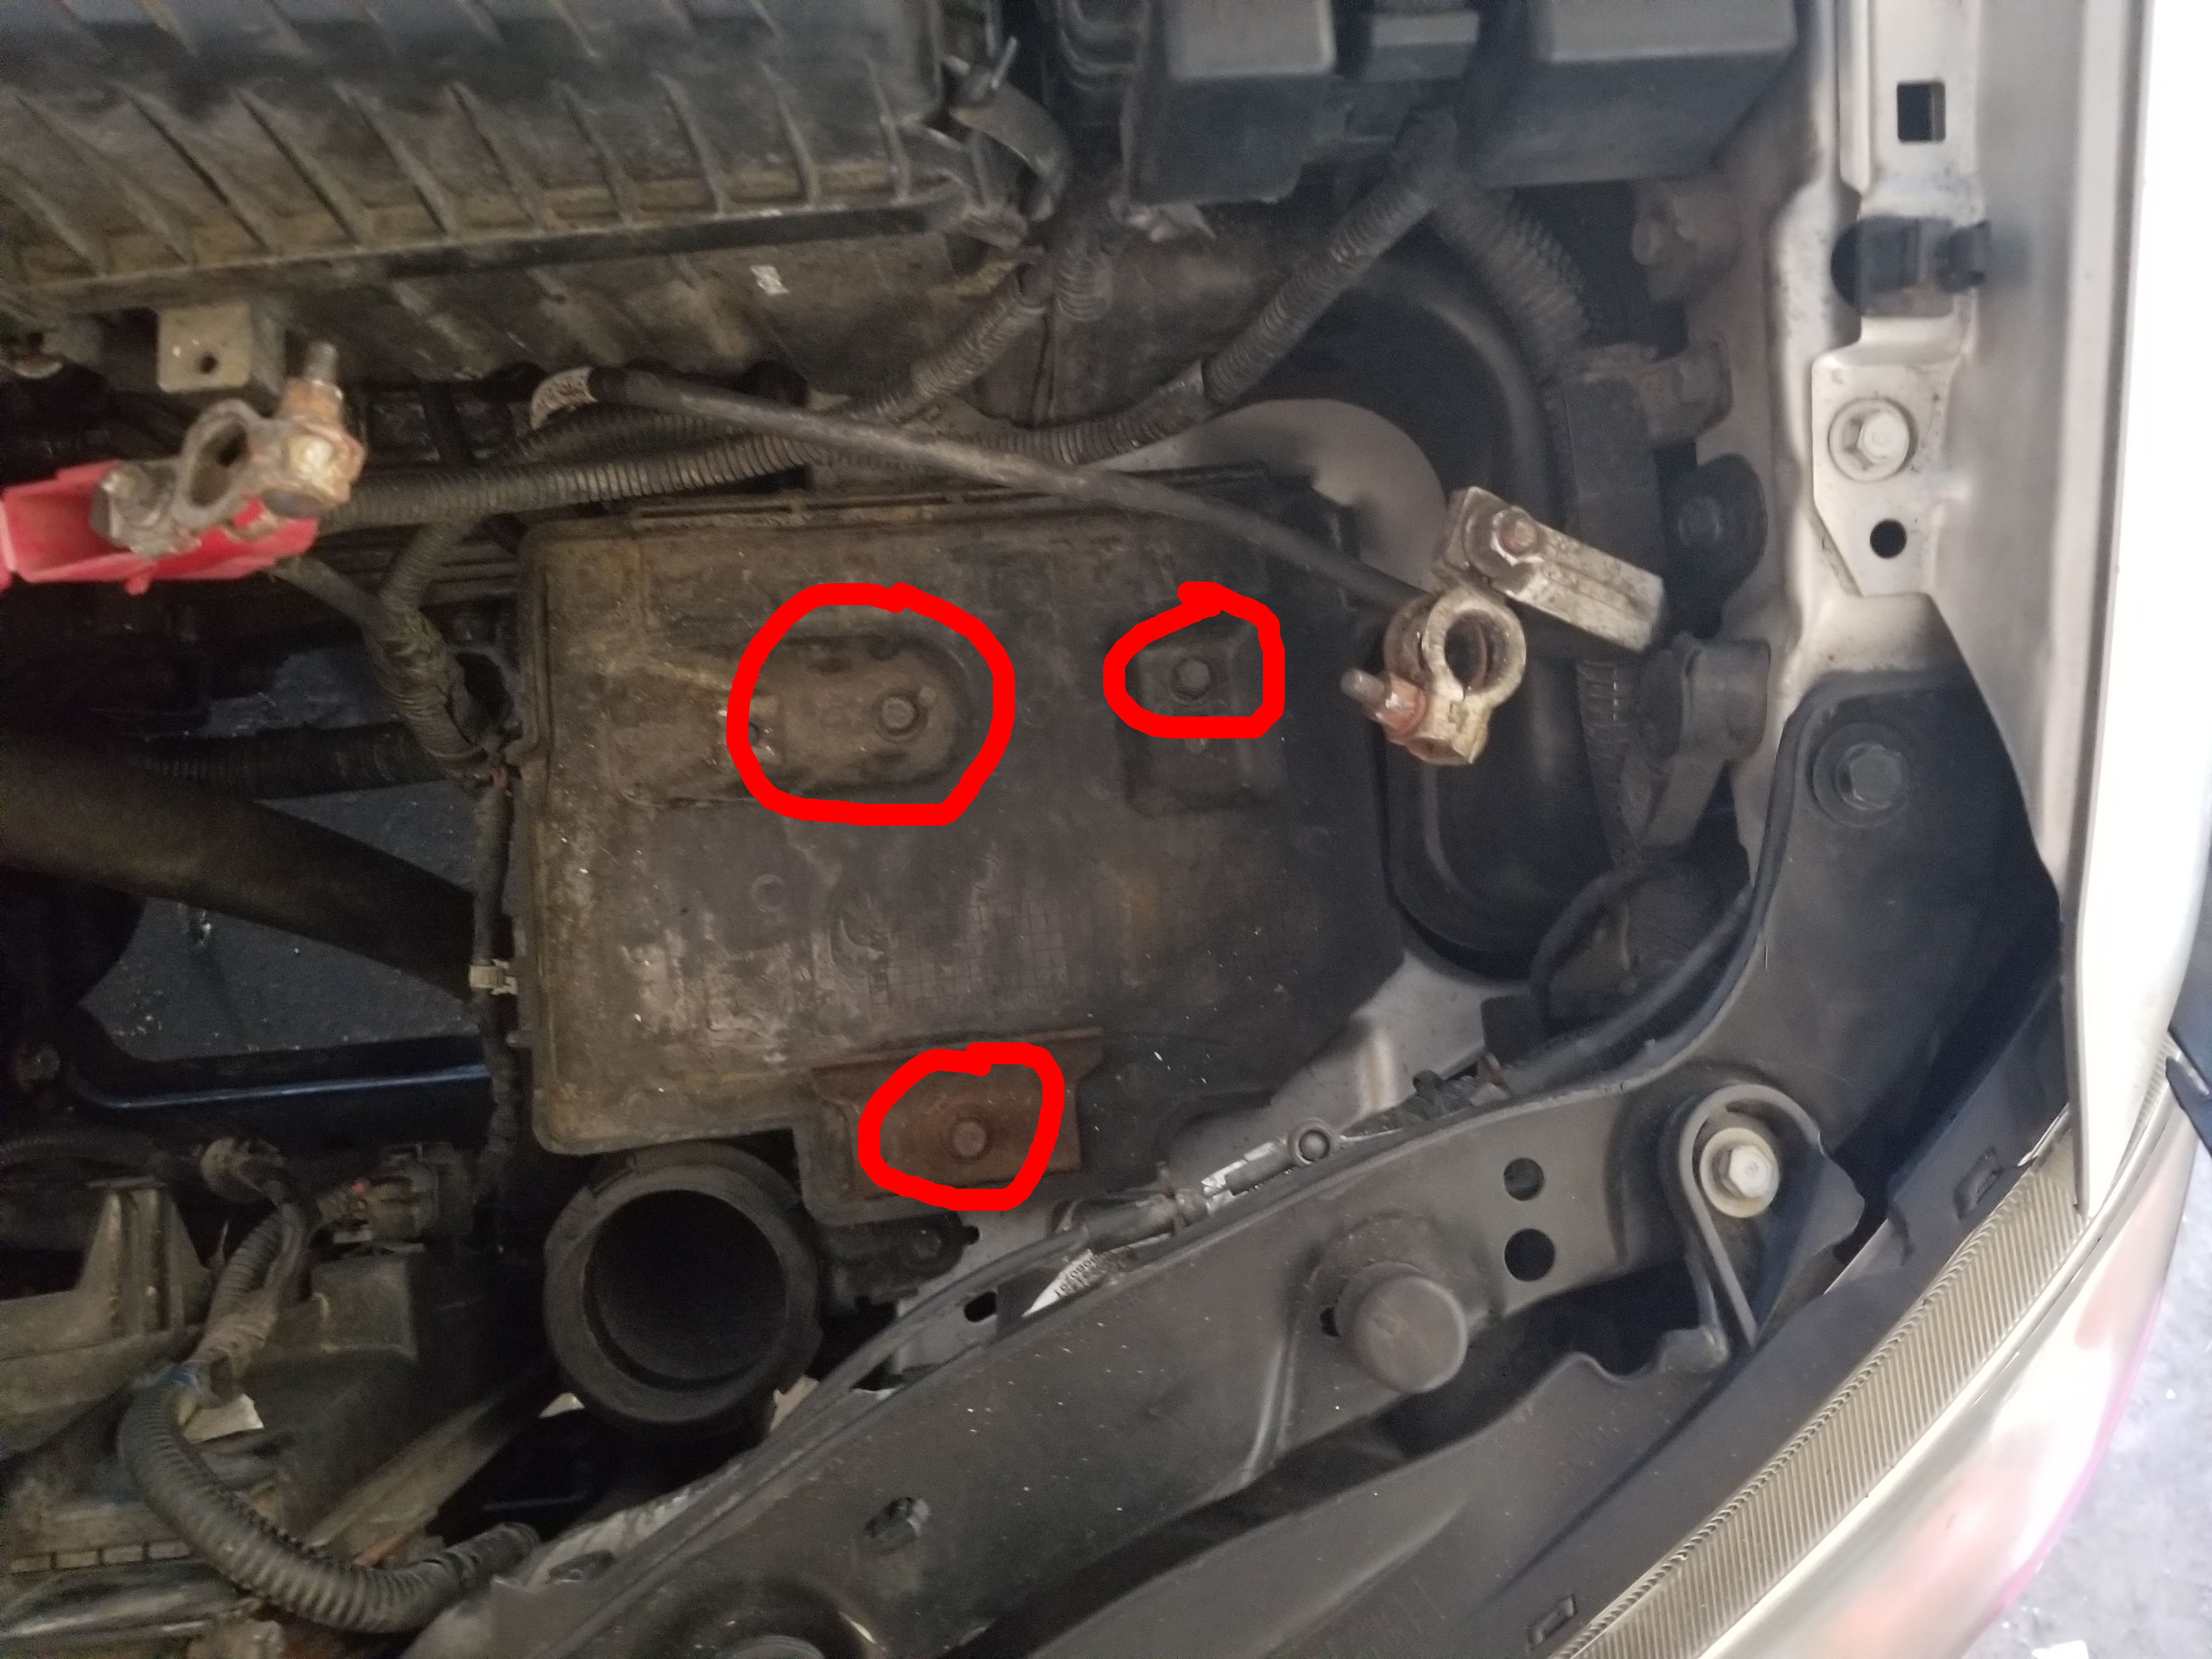
With the battery gone, you can see the battery holder plate. It is secured by three screws. You can see the battery securing clamp at the bottom of the plate, held by one of the screws. A lip at the bottom of the battery fits under that clamp and another fitst under a flange at the back of the plate. The battery is removed by loosening that screw, which releases the battery and allows it to be removed. You can remove the holder plate entirely by removing all three screws.
With the battery plate removed, I loosely screw the bolts that held it into their holes in the engine compartment. When possible, I do this both to keep track of what bolt goes where but also to prevent their loss. Failure to do this is why I lost a bolt in the first go through, but more on that later.

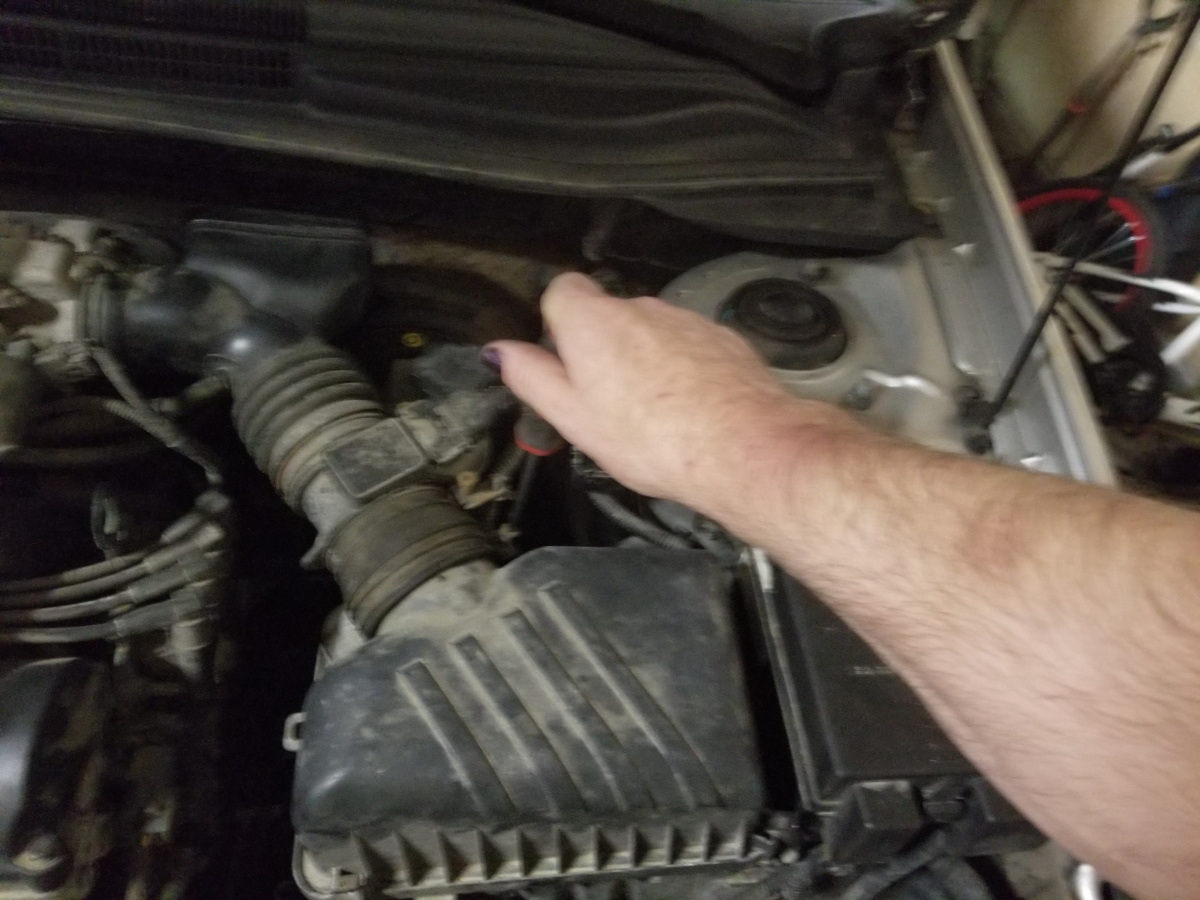
We now begin to remove the airbox. The first step is disconnecting the air filter box cover from the hose. There is a screw clamp at this point. Unscrew the clamp to loosen the hose.

Once the clamp is loosened, you can remove the air filter box cover by unfastening the two clips at the front of it and lifting and pulling it away from the hose.
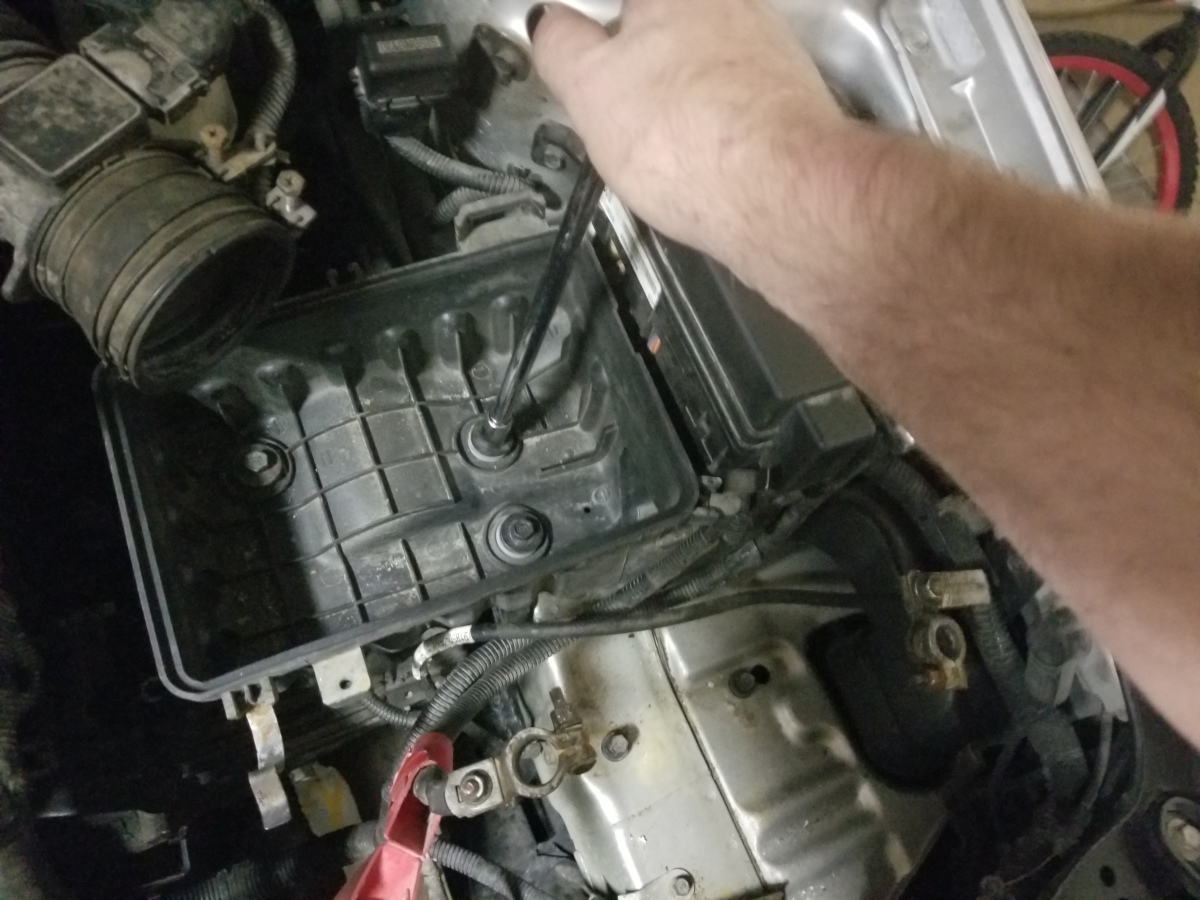
Like the battery holder plate, the air filter box is held in place by three screws. Use a 12 mm socket to remove them.
Once removed, set the air filter box aside. In this case, I simply fit the screws into their holes to help keep track of them later.
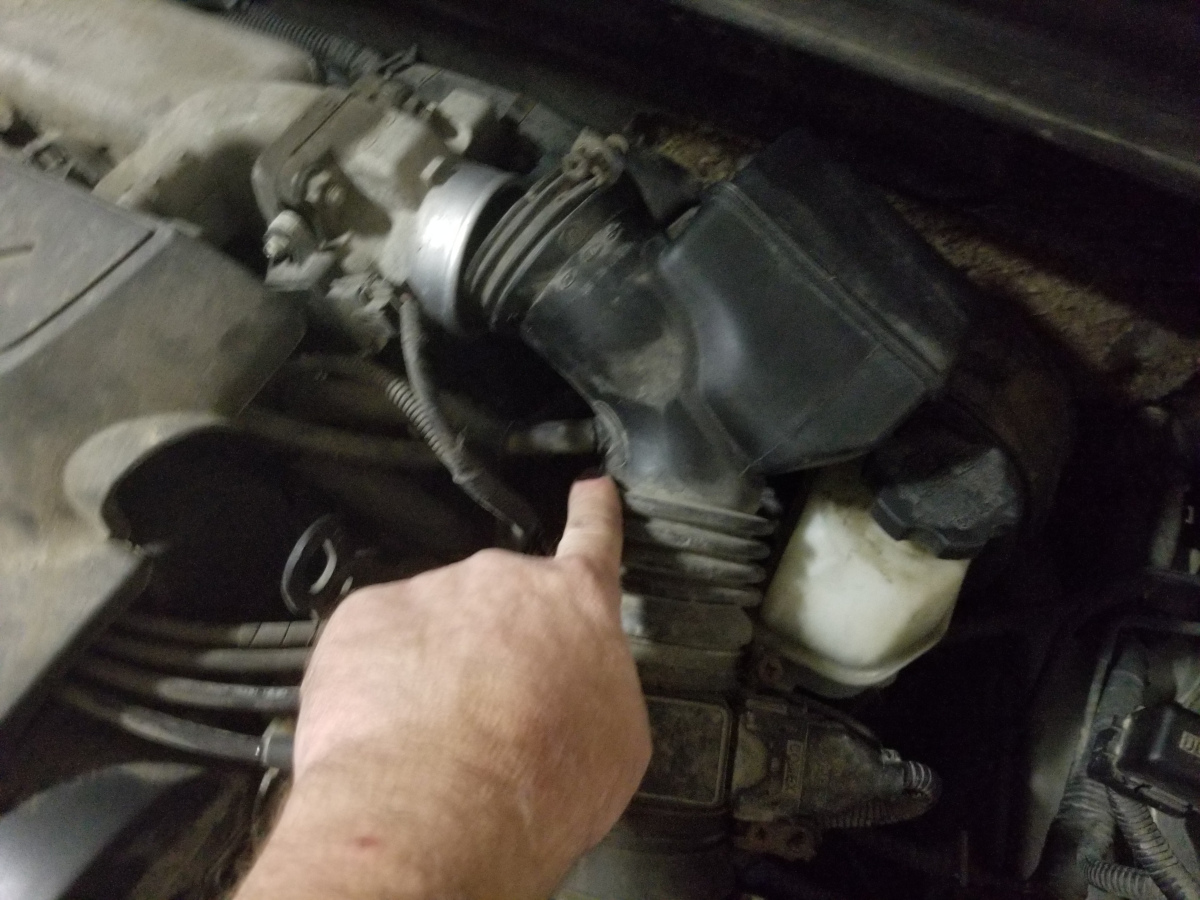
Now we remove the hose from the the throttle body. This uses a screw-type clamp the same as the other end which connects to the air filter box.
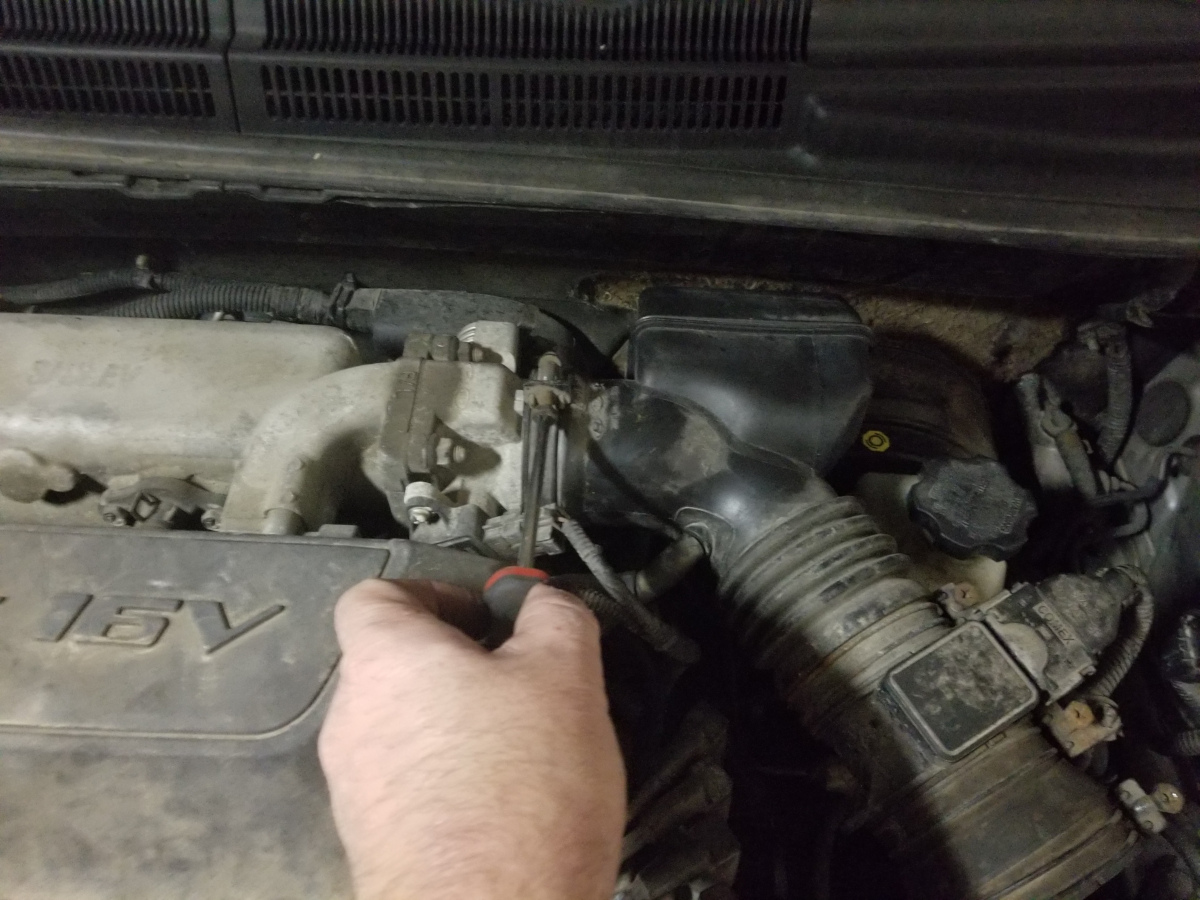
There is another hose that connects to the hose you just removed via a barb connection. Simply pull it free.
Set this hose aside. There is a sensor cable that attaches to it which you can leave. I really tend to minimize any disconnections I don’t have to make. They save attempts to figure out what needs to be reconnected later and the risk of forgetting something.
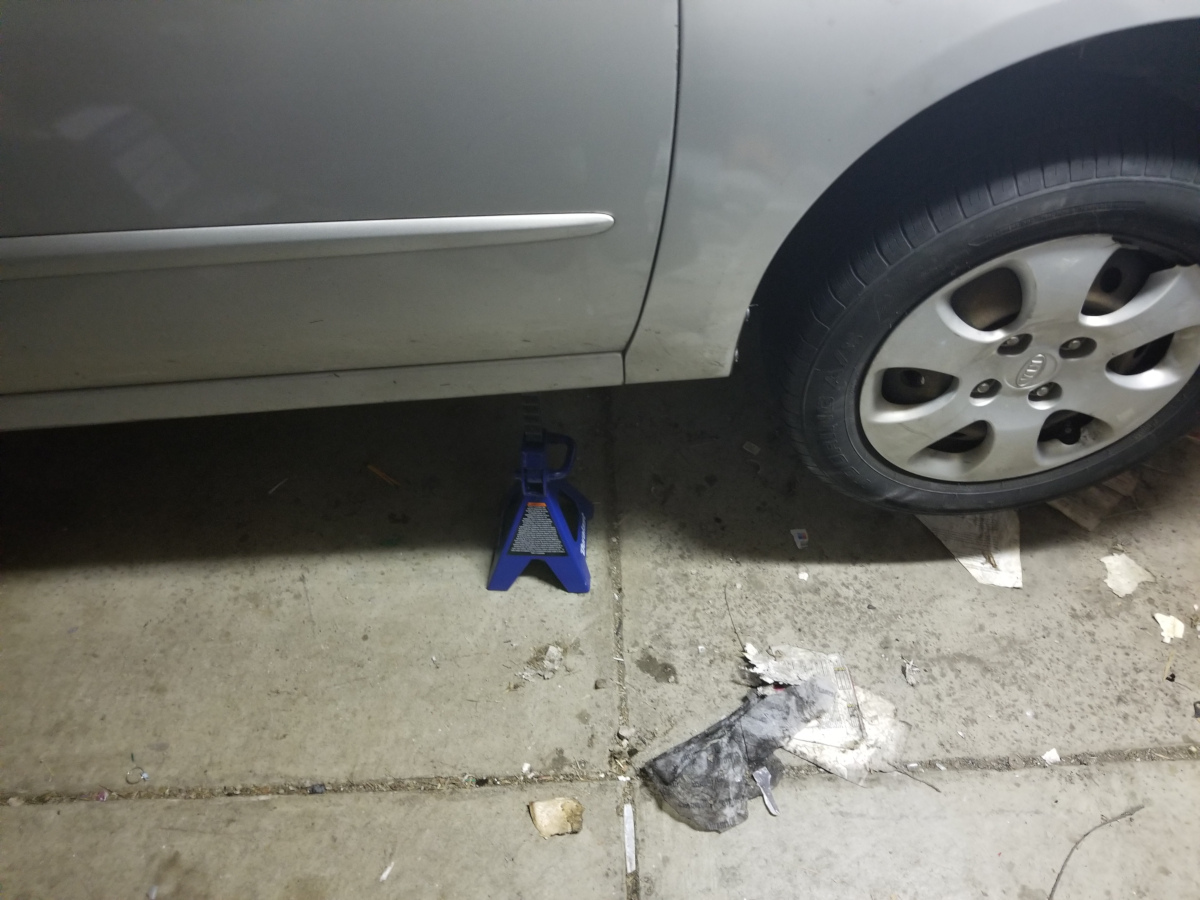
Get the car up on jackstands before beginning work underneath it. Do not rely on just a jack to hold the car in place.
Now we crawl under the car to drain the transmission. The drain plug is on the differential portion of the transaxle on the left side of the car (facing front). Driver’s side in the US. Put a catch basin under the drain hole and remove the plug. I’m not sure exactly what size it is. It didn’t match any of my sockets or wrenches. I ended up using an adjustable wrench to loosen it and it then came off by hand.
We begin removing the axles here. Start by removing the front wheels and tires.
Remove the cotter pin and the axle nut. You’ll need a 32 mm socket for this. You probably should replace them at the end (that’s recommended). At the very least, expect to replace the cotter pin. An impact driver is a big help here. Otherwise you’ll need some way to hold the rotor and hub in place while you break loose the axle nut. The axle nut is backed up by a thick lockwasher. Set both nut and lockwasher aside for now.
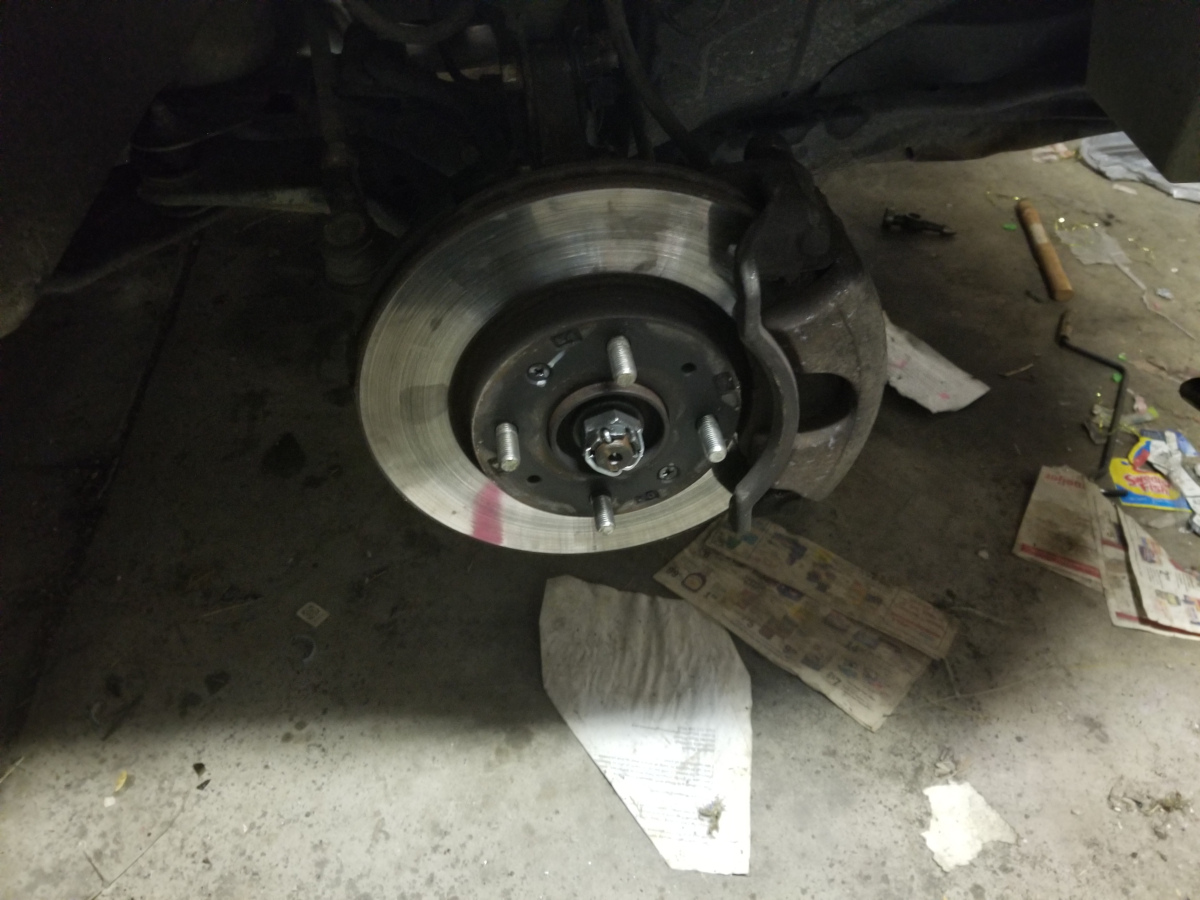
Remove the brake caliper and its mounting bracket and use zip ties to hang it out of the way. You don’t need to separate the caliper from the bracket. Just unbolt the two 17 mm head bolts securing the bracket to the disk brake dust shield and remove bracket, caliper and pads as a unit.

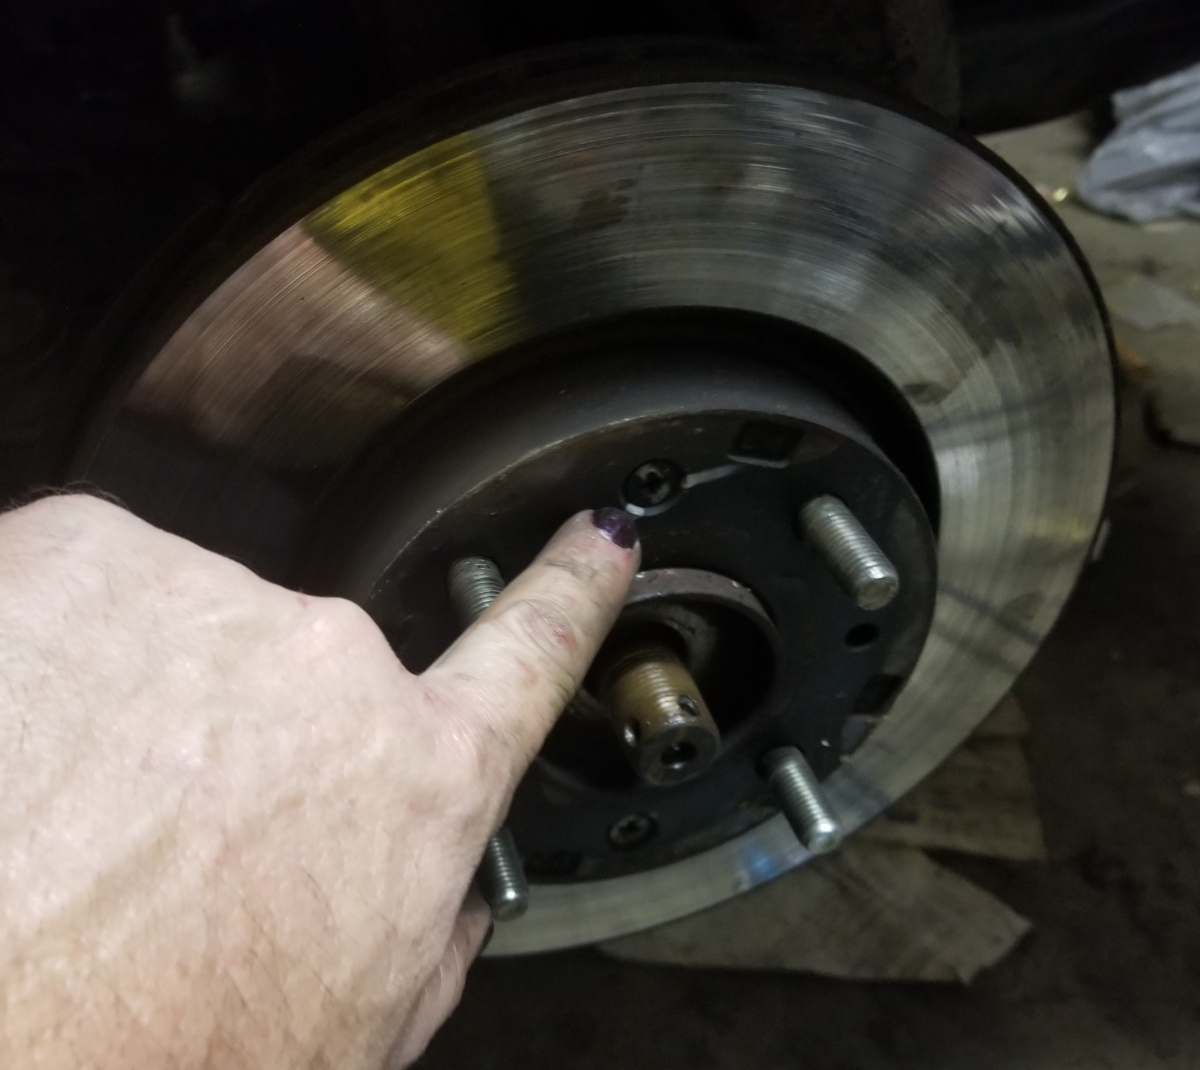
The rotor is secured to the hub with two screws. I haven’t seen that before in other cars and didn’t notice at first resulting in my doing a lot of fruitless tugging the first time through. Use a Philips screwdriver (“+” type) to remove the screws. The rotor slides off easily after that (or maybe not if there’s significant rust sticking it to the hub).
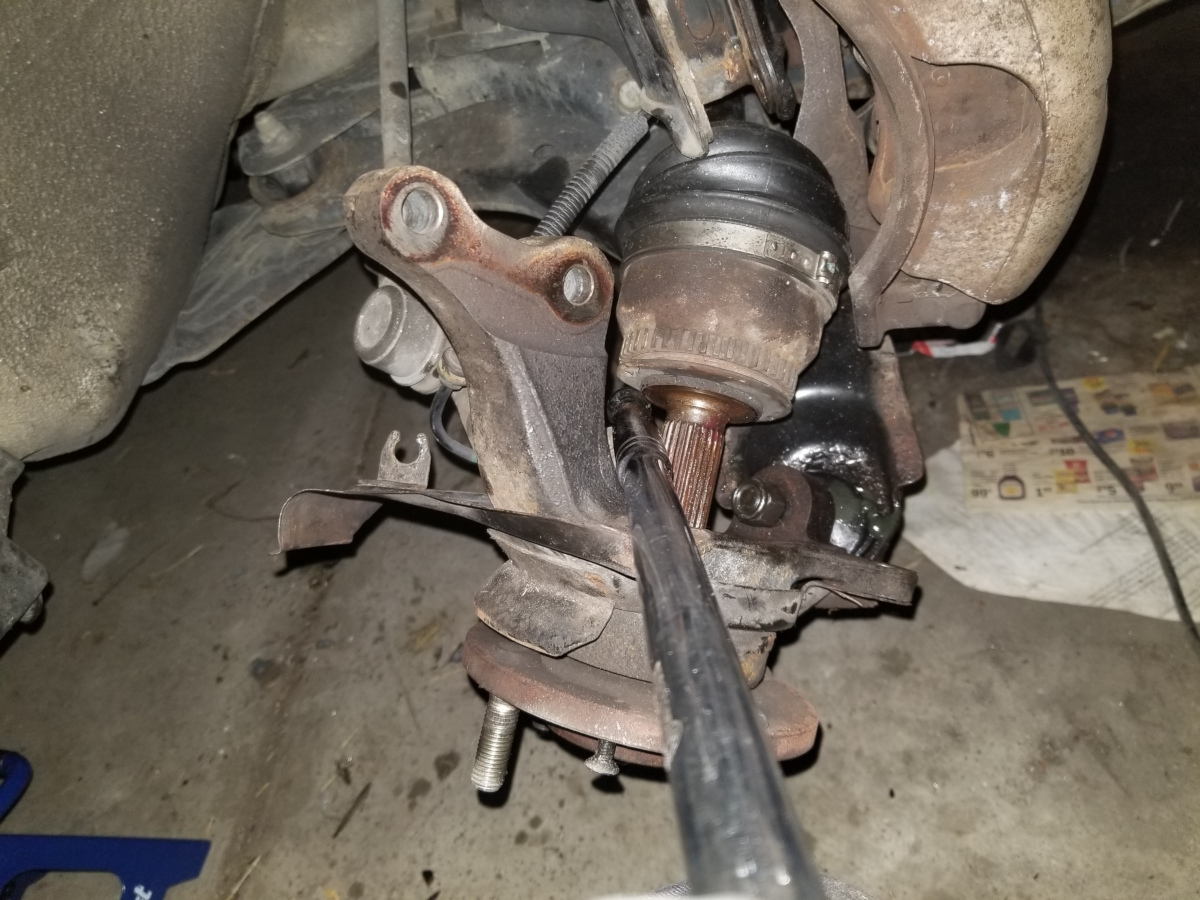
I have seen instructions for three ways to get enough motion in the steering knuckle and hub to be able to get the axle free at this end. The first was the one in my Haynes manual to remove the nut securing the ball joint to the lower control arm and pop that loose. That did not work (and thus is not shown here). The ball joint simply would not come free of the control arm. Indeed, it didn’t budge. The second was to remove the nut securing the ball joint connected to the tie rod. Same problem there (and, again, thus not shown here). The third method, which did work, is to disconnect from the strut.
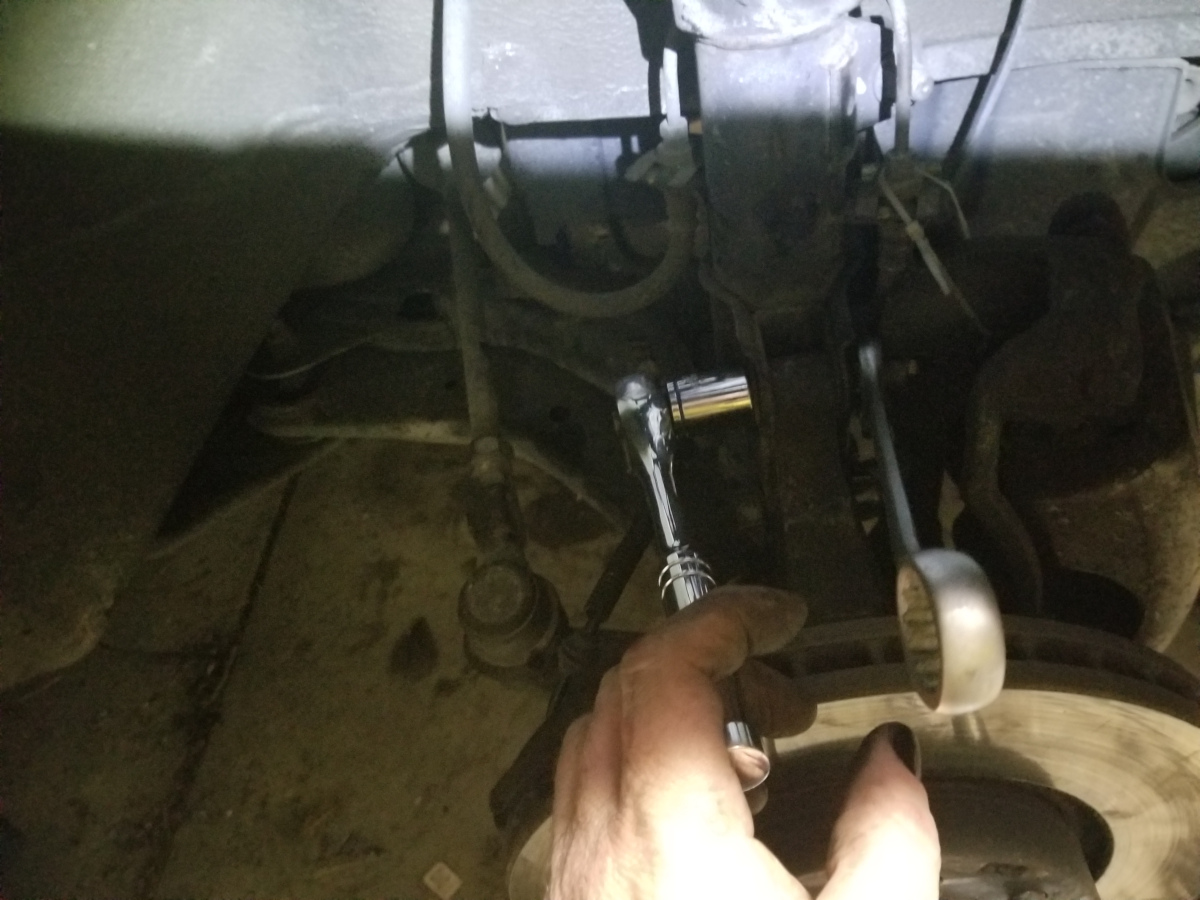
There are two bolts that secure the steering knuckle to the strut. The bolts take a 17 mm wrench or socket (socket used here). The nut, however, takes a 19 mm wrench or socket (wrench used here). (Note: picture taken before rotor removal.)
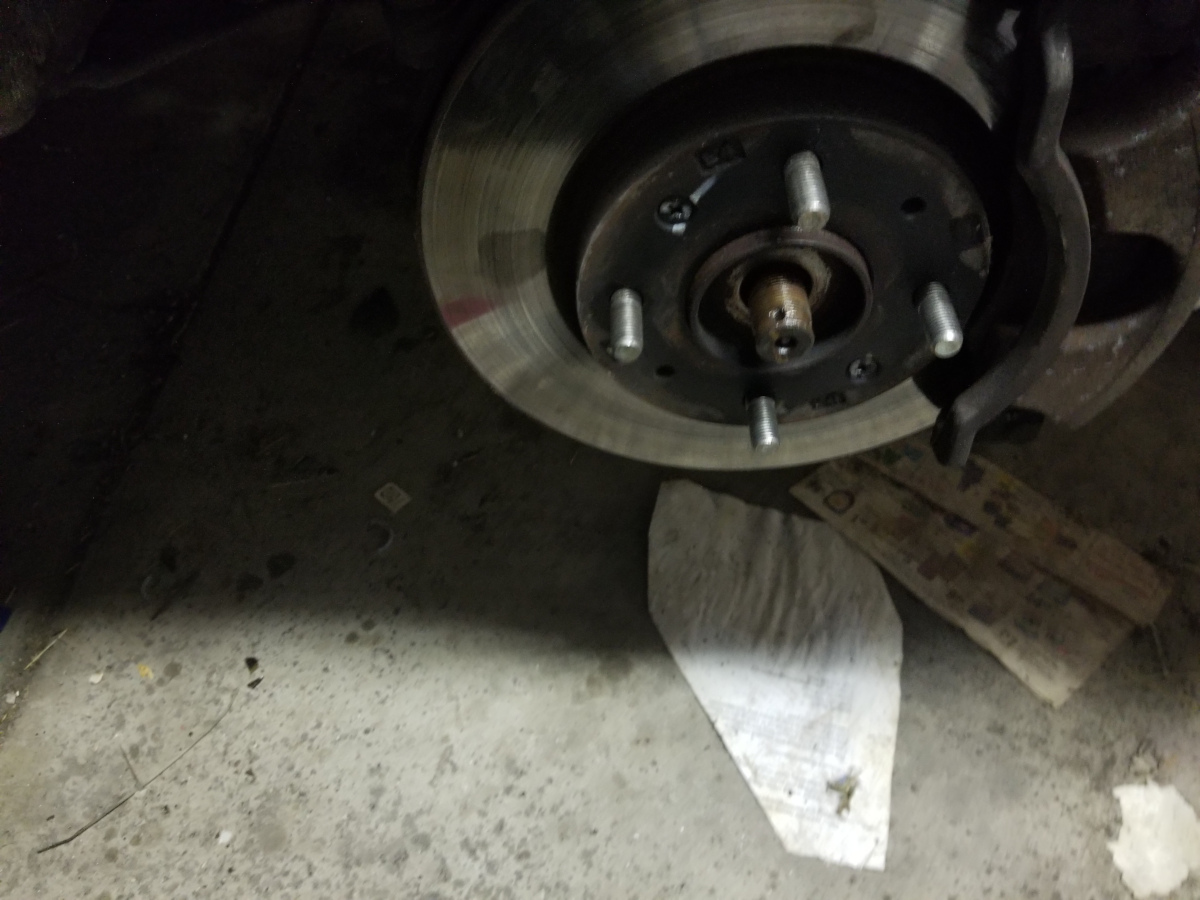
Here the hub is with the bolts out and the rotor off.
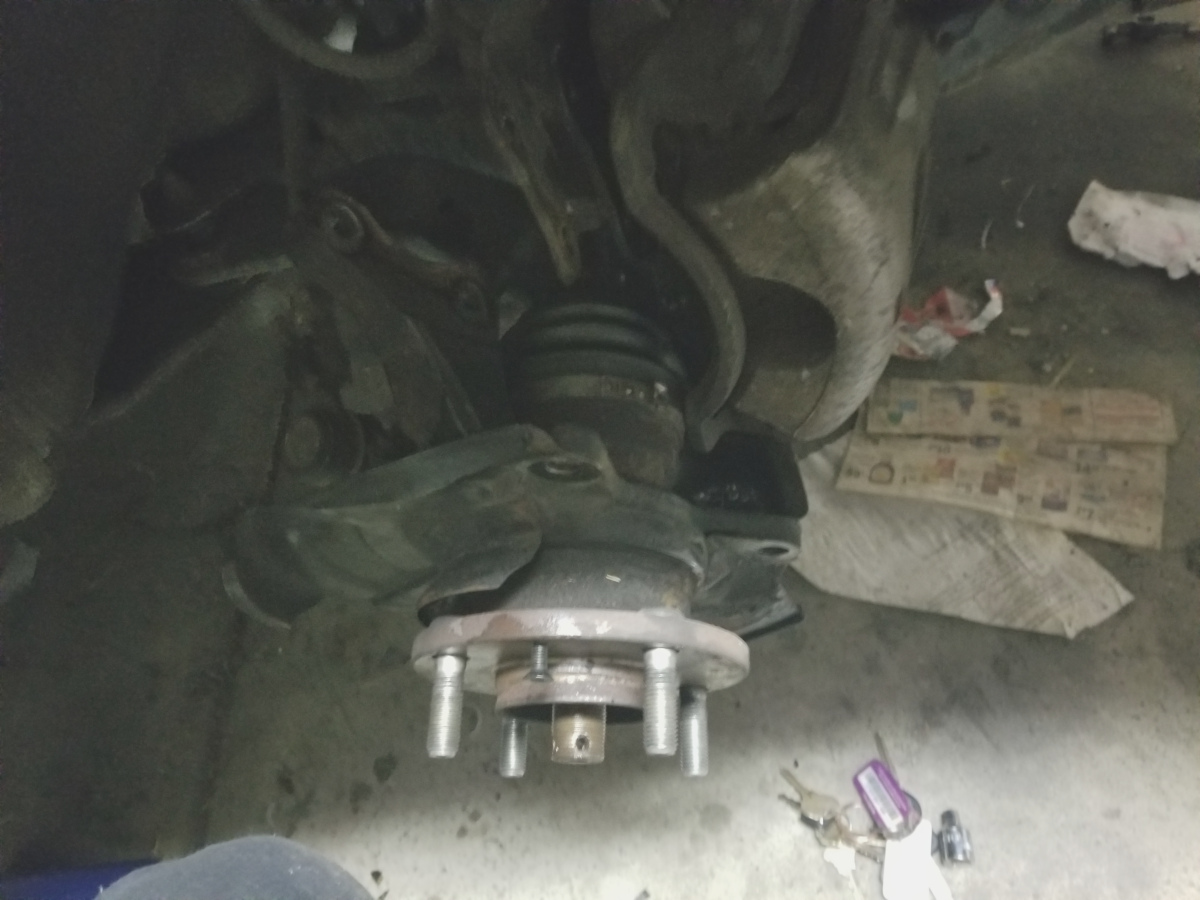
At this point you can pull the hub to the side and begin to work the axle out of it. It may take some creative prying and flexing, but it will come loose.
With the axle free, I thread the castle nut and the lockwasher onto the end for safekeeping. Then it’s under the car to remove the axle from the differential. Get a pry bar between the end of the inner CV joing and the body of the differential (in this case I just used a very large screwdriver as the pry bar.
A quick “pop” of the prybar causes it to push past the snap ring that normally keeps it in place.
You then repeat the process on the other side.
Once the axles are out, we’re almost ready to start disconnecting the transmission from the engine. There are still a couple of preliminary steps. First we need to support the engine. This is done by putting a jack underneath it with a wooden block to distribute the support. You don’t want to dent or otherwise damage the oil pan as that can crimp the oil pickup which is very bad indeed for your engine.
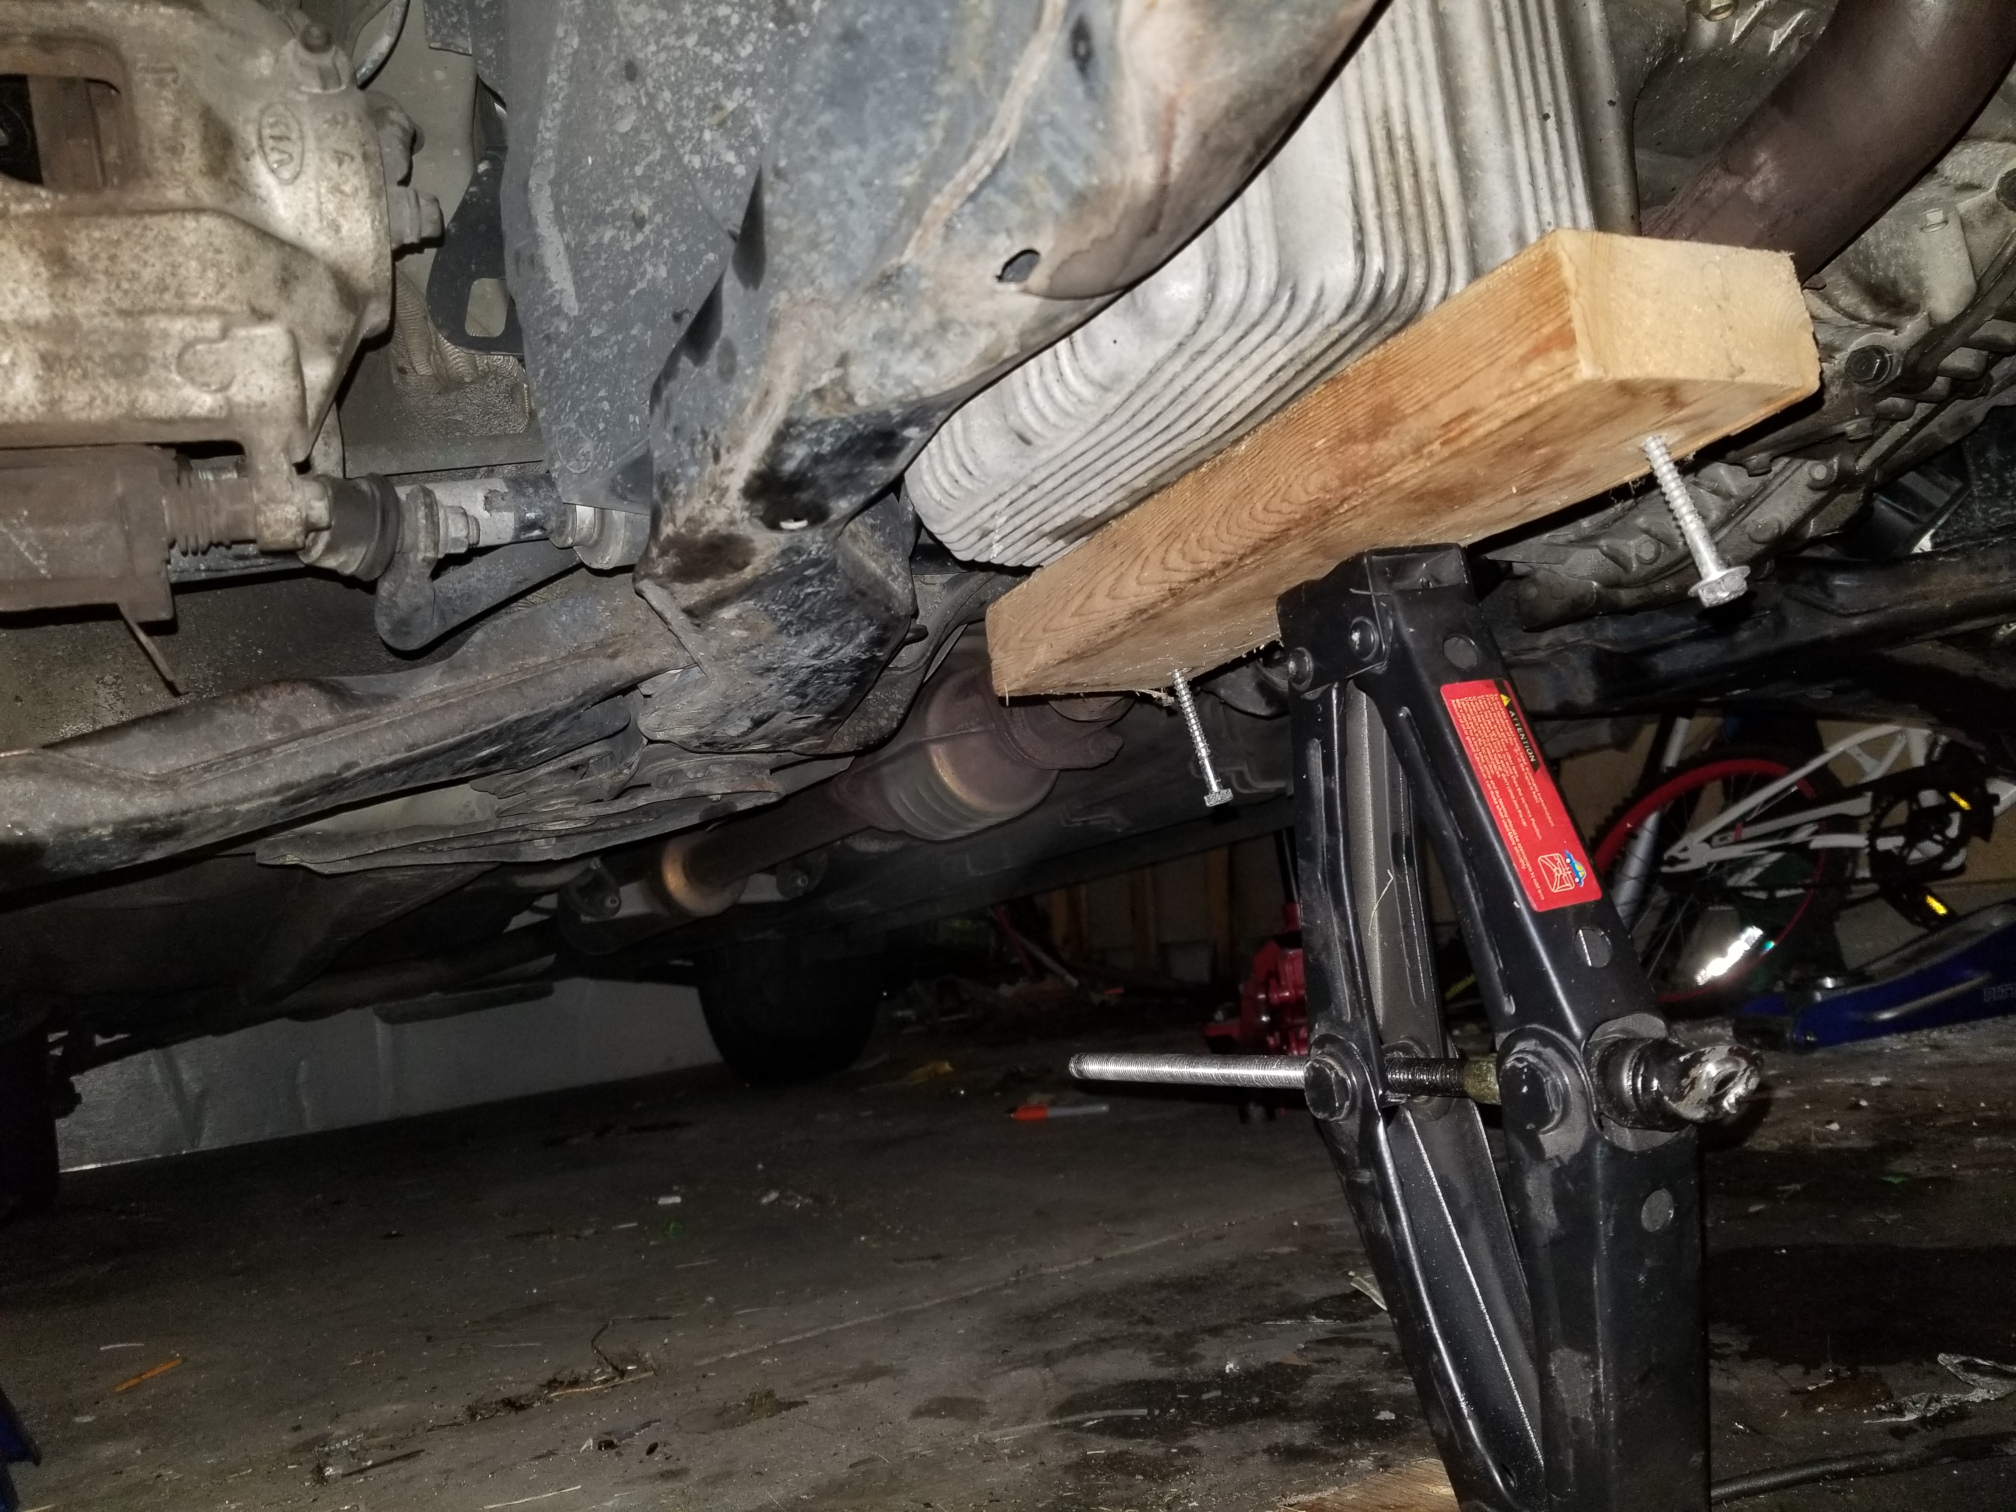
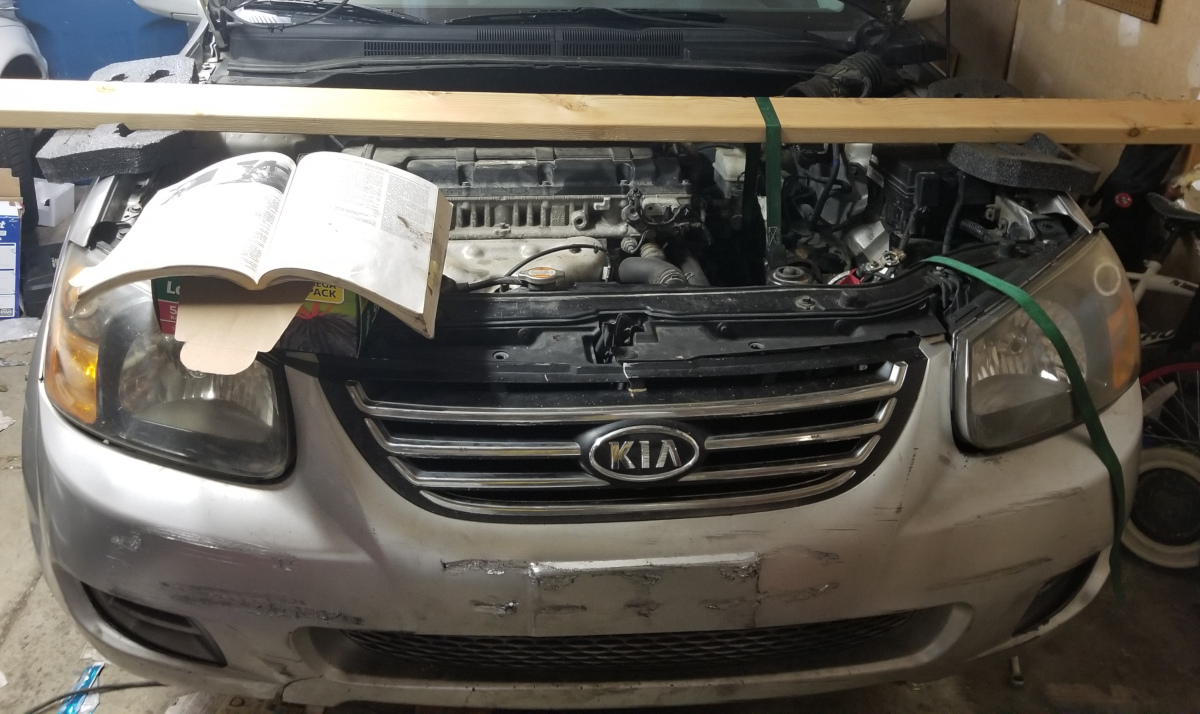
The manual and several online descriptions of the process recommend another jack, preferably with a proper transmission support cradle, to support the transmission. I, however, found that it was easier to support it from above with a two-by-four across the fenders. Rubber pads distribute the weight on the fenders and to protect the paint. A ratcheting tie-down strap can then support the transmission giving a bit better control of position and angle than trying to wiggle it around on a jack:
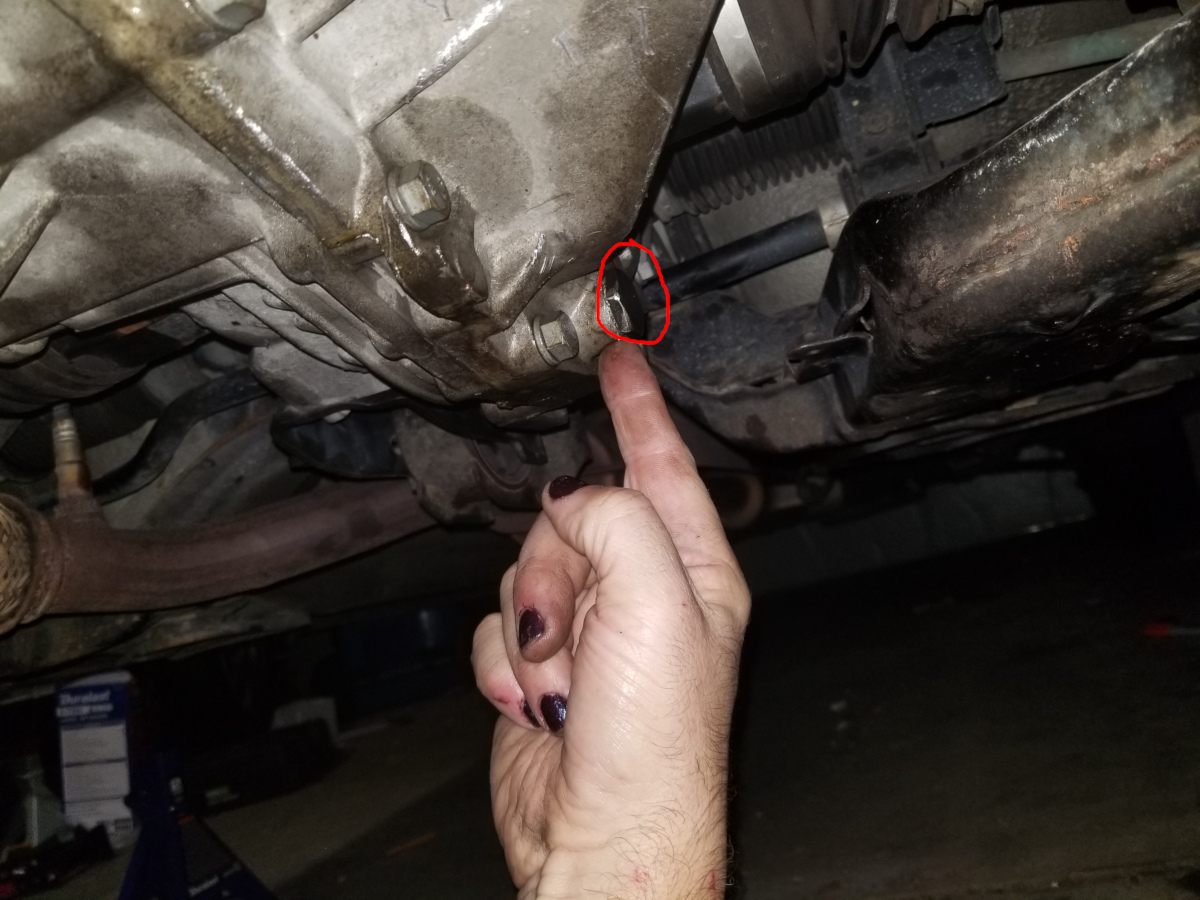
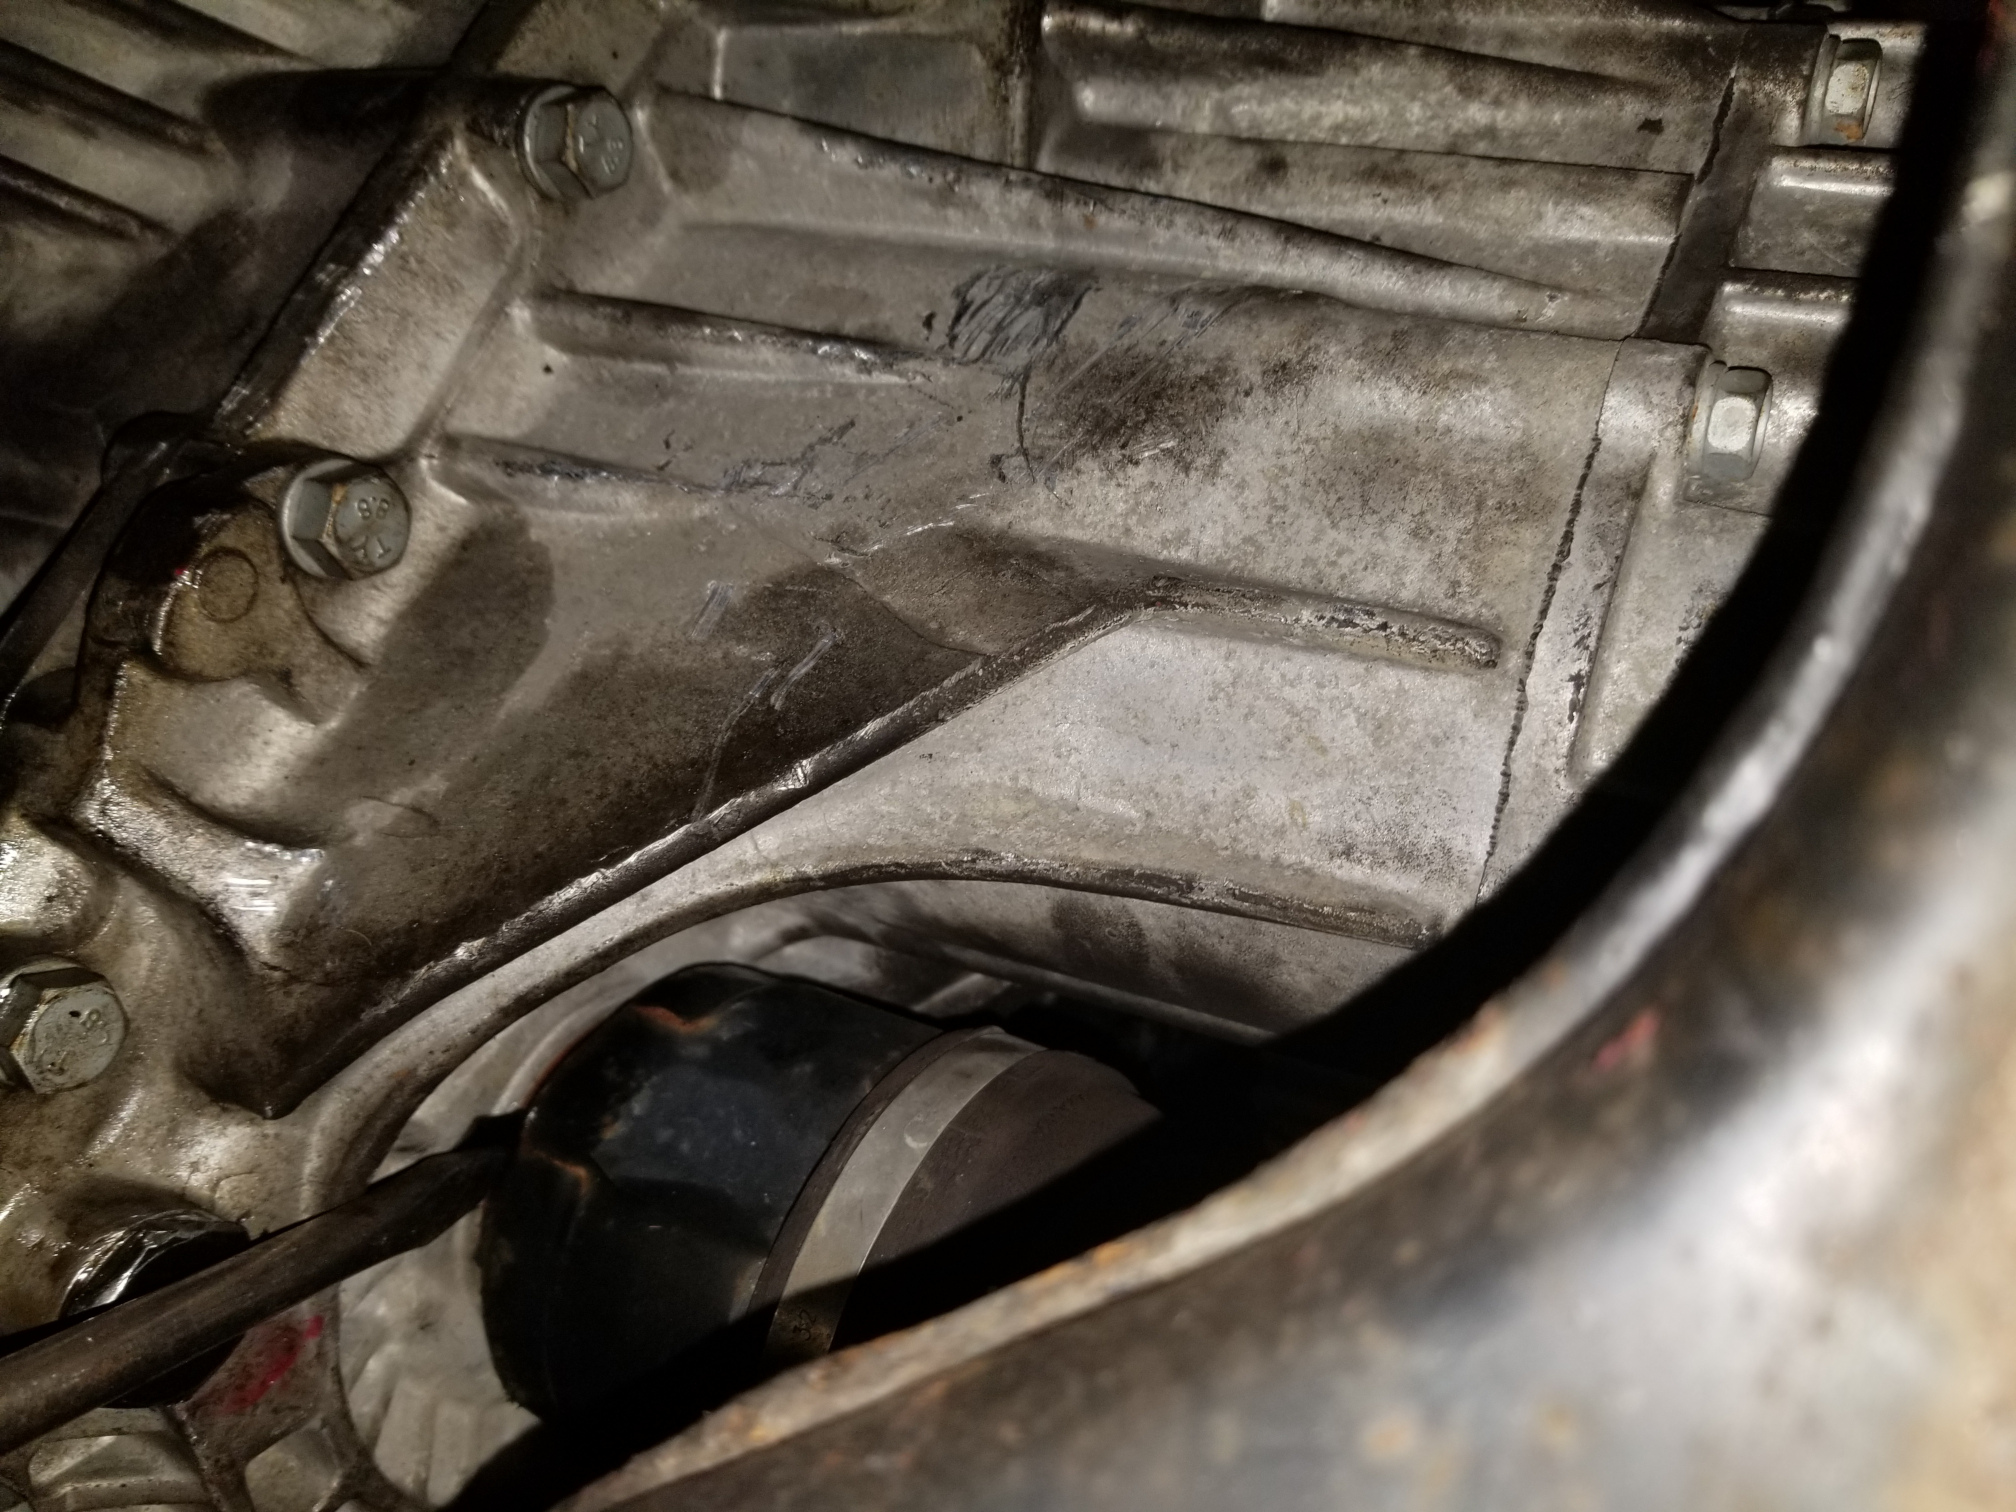
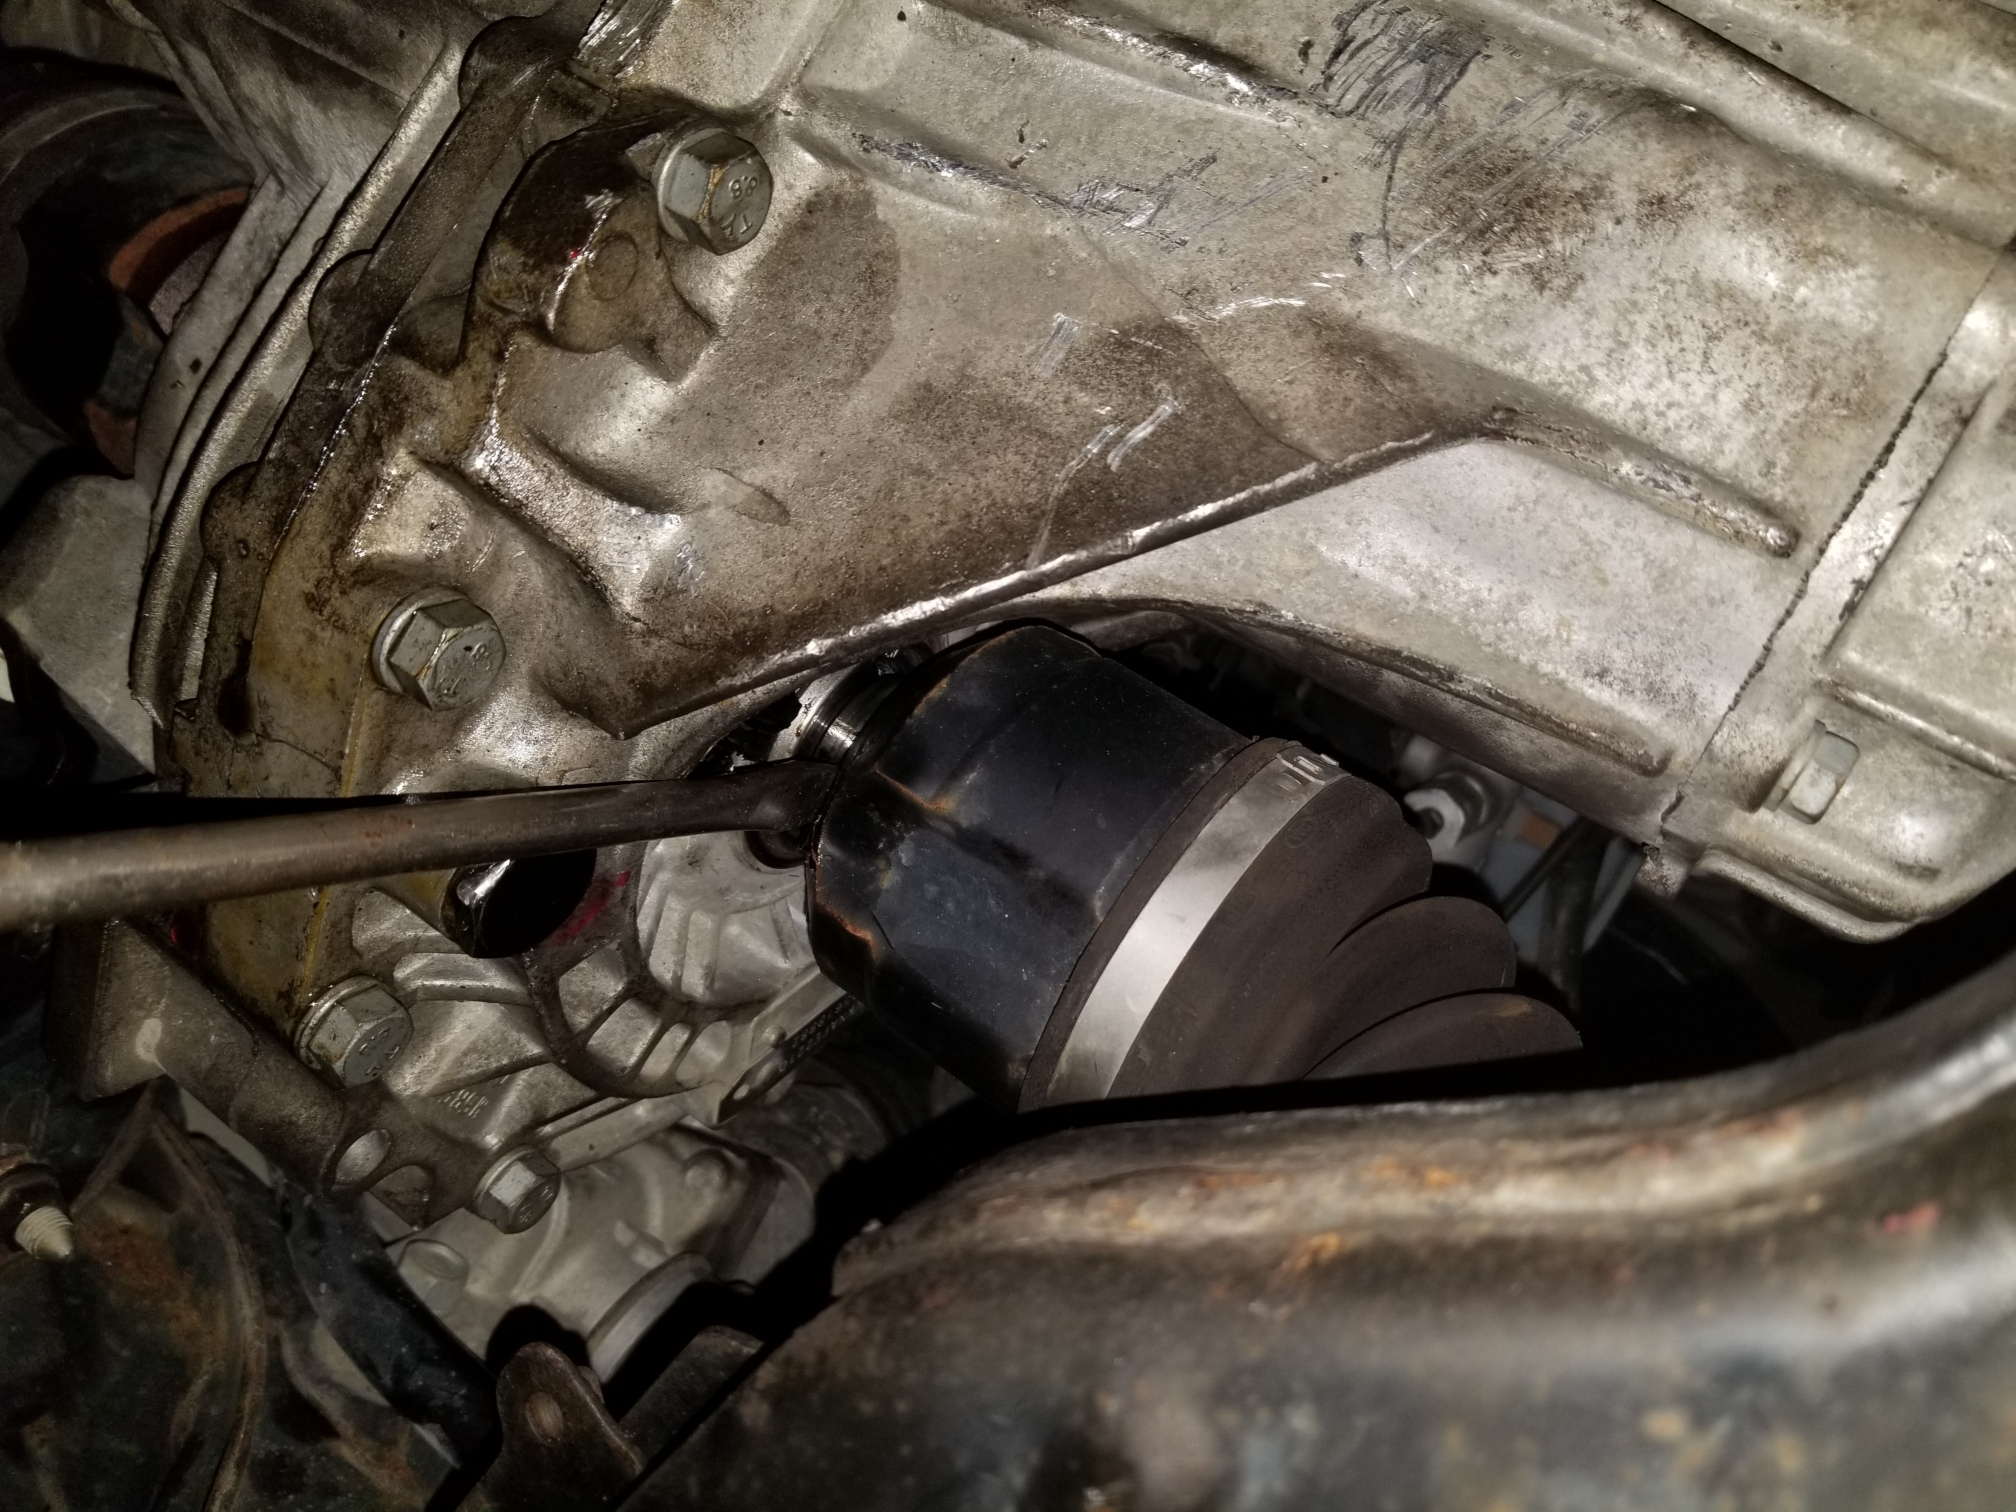
Next I need to disconnect the clutch linkage. There’s a spring clip that holds the pin between the slave cylinder and the clutch lever. Originally it was installed so that it was on the bottom of the assembly. When I first reassembled it, I reassembled it so that the spring clip is on the top. There’s a curved section that runs around the pin and a straight piece that goes through a hold in the pin. You need to pry the hook part away and then the clip slides out of the pin. I’m sure there’s a special tool for this but I just used a screwdriver to do the prying.
Once I had the slave cylinder disconnected, I wanted to double check whether the throwout bearing was engaged with the pressure plate. The reason for this is that if the throwout bearing is engaged, it is not removable and it’s not possible to put the transmission back on and engage the throwout bearing with the clutch fork with it in place. I wanted to be sure before doing that.
I used a large socket which fit over the clutch lever with an extension in the back of it as a lever to give me purchase on the lever:
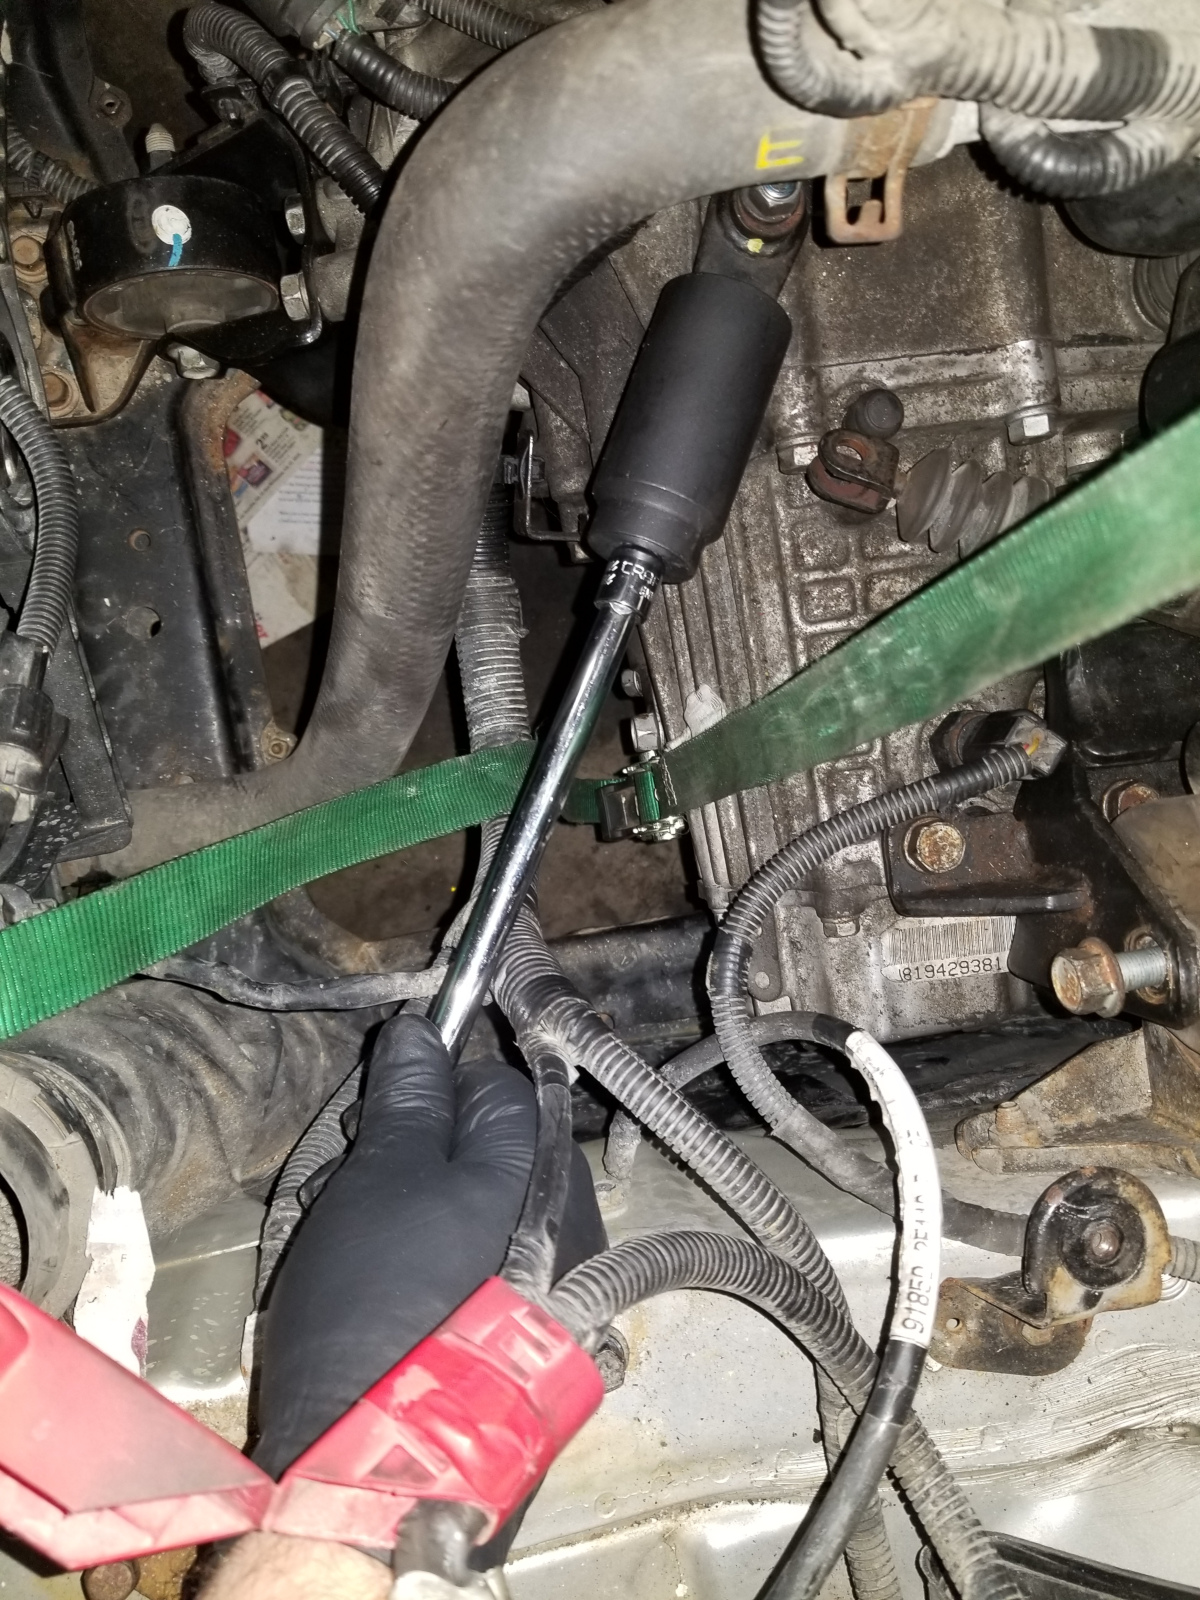
I was able to move the lever against strong resistance. After a certain point the resistance let up slightly, but only slightly. This was exactly what I would expect with the throwout bearing engaged and the geometry of the “fingers” that apply pressure to the clutch.
So, whatever problem there was with the car, it wasn’t that the throwout bearing was not engaged–installed backwards or whatever–and I could console myself that I hadn’t made such a boneheaded mistake. But I still did not know why the car would not start.
Having no better ideas, I reconnected the clutch linkage, temporarily reinstalled the airbox and battery, got in the car, pressed the clutch pedal (it felt about right this time), and inserted and turned the key.
Damned if the engine didn’t start.
So, at that point it was a matter of reinstalling all the various pieces-parts of the car (mostly a reverse of the removal)–I may edit this to add those pictures in later–and try out the car.
It ran. Clutch felt great. A little “grabbier” than it was before (no great surprise) so it took a little getting used to exactly where the “grab point” was to avoid stalling the engine when starting out but otherwise running quite smoothly.
Last thing to do is to replace the transmission fluid. What’s in there right now is a mix of the “right” stuff (75W90 GL-4–do not use something that’s both GL-4 and GL-5), something that’s not quite right but I had on hand (GL-3 and…unknown weight), and the old oil put back in. I ordered a supply of the correct oil (none of the local stores I’ve see have the correct oil) and simply have to get back under the car to drain the old and put in the new.

Really cool pictures of you working on your Kia. Good job!
Maybe it was made in Slovakia (we have a big Kia plant).
I wish the youtube instruction videos I often watch when I need them were as good as this.
I remember decades ago changing the transmission on my old ’68 Buick V8.
Working on cars is hard work.
But it’s also cool.
LikeLike